How to Organize a Small House With No Storage Space

Living in a small house with limited storage space can feel overwhelming, especially when you have a lot of stuff to keep track of. From clothes to kitchenware, furniture to books, the list of items can seem endless. It’s easy for things to pile up, creating an atmosphere of clutter in almost every room of your house. However, with the right strategies and creative thinking, you can overcome the challenge of organizing a small house with no storage space.

This guide discusses storage ideas, tips, and solutions to help you turn your cramped living situation into a more organized, efficient space. Whether you’re dealing with living rooms, bedrooms, kitchens, or bathrooms, there are countless ways to optimize the storage and organization of your home. Let’s dive into how you can organize a small house, maximize storage, and keep your home clutter-free by using creative solutions like hangers, embracing minimalism, and utilizing stackable storage options, corners, and under-bed space. By learning how to streamline your belongings and incorporate multifunctional furniture, you can make the most of every inch of your home.

1.  Maximizing Closet and Cabinet Storage

In any home, closet, and cabinet space are some of the most valuable areas for storage. Unfortunately, they are often underutilized, leaving you nowhere to store your belongings. The key to efficient closet organization is keeping the clothes and accessories you need and utilizing every inch of available space for maximum storage. Consider adding a shelf to store extra items or organizing your bedroom closet by incorporating bins or baskets for easy access to your belongings. Thanks to innovative solutions, you can turn even the tiniest closet into a well-organized space. If you’re still struggling to find something to organize your closet, a post about maximizing doors as additional storage space might offer some fresh inspiration.

Smart Closet Organization

Start by assessing all the items in your closet. Consider donating or discarding anything that you no longer use or need. Once you’ve cleared out the excess items, it’s time to organize what’s left. Closets are perfect for storing clothing, shoes, and accessories, but they also offer the opportunity to store other items neatly and organizedly. 

  • Shelves: Add extra shelves to your closet for storing shoes, bags, books, or small accessories. Consider adjustable shelves that can change based on your storage needs. You can also use these shelves to store items like magazines or keep advice, news, or other helpful content easily accessible. 
  • Baskets and Bins: Use baskets or bins inside your closet to store easily lost or mixed-up items. These are ideal for storing small accessories like scarves, hats, and shoes. In addition, you can place them near your entryway for easy access when you leave the house. You can also create a dedicated page or section to organize your frequently used items. This will become an essential part of the process to keep everything in its place.
  • Over-the-door Organizers: Install over-the-door organizers for additional storage. These can store shoes, cleaning supplies, or accessories without taking up floor space. You can also use them to store important information, tools, or small items. Consider using these organizers to keep items in hand if you have a garage. They can even be helpful if someone in your household needs quick access to everyday items. 

Cabinet Organization

Your kitchen and bathroom cabinets are another area where storage can be maximized. Think about making the most of the available cabinet space without crowding or cluttering them with unnecessary items. One way to do this is to take a step back and evaluate how you can organize each spot better. You can store the most-used things in the front and find hidden places for items you don’t need as often. When organizing, please also make the most of closet space, as it can be a great addition to your cabinet organization.

  • Pull-Out Drawers: Install pull-out drawers in your kitchen cabinets to access items easily. This is a great way to store pots, pans, and small kitchen appliances. You can also create a space for your subscription boxes or items related to your hobbies, whether related to a specific field like cooking or crafting. Add some decorative touches like decor items or even a mirror to enhance the functionality and appearance of your cabinets. 
  • Vertical Storage: Use the space on your cabinet walls for additional shelving. You can install hooks, rods, or additional shelving units to store kitchen essentials such as utensils or spices.

2. Declutter and Organize Your Rooms

Decluttering is the first step in organizing a small house. When your rooms are filled with clutter, it can feel impossible to keep everything tidy. By focusing on decluttering each room, you’ll create more room for storage and organization. Consider creating an account of what you own to help with the process. For instance, consider adding some decorative shrubs or incorporating different furniture styles to make the space feel fresh. Additionally, consider optimizing kitchen cabinet storage to ensure everything has its place. 

Living Room

The living room is a common area where things can quickly pile up. Between books, furniture, and electronics, it’s easy for your living space to become disorganized. One of the most important aspects of organizing your living room is creating spaces for everything to go. For example, you can organize the area by incorporating suitable storage solutions for your apartment. Prioritize health by keeping cleaning supplies accessible, and don’t forget about the laundry room, which can serve as an extension of your living space. You can also check out a blog for more tips on organizing different areas of your home. 

  • Furniture Storage: Invest in multifunctional furniture, such as ottomans that offer hidden storage space or coffee tables that double as storage units. These types of pieces are perfect for maximizing storage in tight spaces. You can also consult with experts on how to organize more efficiently. For example, you can utilize the space under your bathroom sink or add extra stairs to create more vertical storage. Storage cabinets can also be an excellent solution for keeping your home organized and tidy.
  • Wall Shelves: Adding wall shelves is an excellent way to clear up space on the floor. You can place books, magazines, or decorative items on these shelves, which helps free up other spaces in the room. Consider installing a shelving unit to store items like electronics or a favorite device. Depending on the season, you should adjust what you keep on the shelves. For example, store more books during colder months or swap them for seasonal holiday art. 
  • Storage Baskets: Use decorative baskets or bins to store items like remote controls, magazines, or games. Baskets provide a great way to organize your belongings without sacrificing style. Additionally, you can store everyday essentials like a fridge magnet or makeup in these bins. If you’re concerned about space, remember that these baskets can also serve a practical function. If you have a clutter issue, ask for comments from family members or friends on how they organize similar spaces. 

Kitchen and Pantry

The kitchen is often considered the heart of the home, but it can also be one of the messiest places in a small house. Between utensils, appliances, and food, a kitchen can become overcrowded quickly. The key is to keep things organized by using every available space for storage. Consider utilizing premium storage solutions for items that need to be accessed often. For example, rights to additional storage areas in nearby rooms, such as the dining room, can be a great way to keep things in order. You can place smaller kitchen items on the side of cabinets to free up more space for essentials. 

  • Pantry Organization: Organize your pantry with clear containers or baskets. Group similar items together and use labels to identify what’s inside easily. Bins or storage jars organize pasta, rice, and dry goods. You can also store snacks or canned goods in a dresser or cabinet for easy access. Kids should consider using colorful containers or strips of labels to help them find their favorite snacks. Every piece of your pantry organization system can make a huge difference, no matter how small the item. 
  • Kitchen Cabinets: Maximize the space inside your cabinets by using pull-out shelves, tension rods, or adjustable dividers for things like plates, cups, and bowls. Use baskets to store snacks, spices, and other smaller items. If you’re looking for an extra tip to make your space feel livelier, consider placing small plants inside your cabinets or on the shelves. This simple addition brings more life to your kitchen. Another idea is to organize your pantry by storing canned goods in the basement or somewhere out of sight. You can also create a specific storage space for bulky items like mixing bowls or blenders. 
  • Use Vertical Space: Install shelves or hooks to keep things off the counter. Hang utensils, mugs, or pots and pans on the wall to save valuable drawer space. For larger items, consider using the bottom of your cabinets for storage. You can also add hooks or a set of bins to the cabinet doors for extra organization. Store kitchen essentials or jackets in these hidden spaces to keep your counters and cabinets clutter-free. 

Bathroom Storage

The bathroom is often one of the smallest rooms in the house, making organizing tricky. It is essential to use the space efficiently between towels, toiletries, and cleaning products.

  • Shelving Units: Add shelving above the sink or toilet to store bathroom essentials like shampoo, soap, and extra towels.
  • Under Sink Storage: Utilize the space under the sink with baskets or pull-out drawers. This can be a great place to store cleaning products, extra toiletries, or extra towels.
  • Storage Containers: Consider using clear plastic containers or baskets inside cabinets to organize smaller bathroom items neatly.

3. Creative Storage Solutions for Small Spaces

Organize a small house with no storage space using efficient solutions from McDowell Mountain Community Storage in Scottsdale, Arizona.
Discover clever storage solutions for small homes with McDowell Mountain Community Storage, Scottsdale, Arizona.

When living in a small house without storage, sometimes you must think outside the box. Creative storage solutions can make a huge difference in maximizing your available space. Whether you use storage bins or install custom shelving, these solutions help create more room and reduce clutter.

Vertical Storage

One of the most effective ways to organize small spaces is by utilizing vertical storage. Adding shelves or hooks to your walls can create significant extra space without taking up any floor area.

  • Wall-Mounted Storage: Install wall-mounted shelves or racks to store books, decorative items, or everyday necessities.
  • Hooks: Hang hooks or racks on the wall to store coats, bags, or keys. These are ideal for areas like entryways or bedrooms.

Multifunctional Furniture

Invest in multifunctional furniture that doubles as storage. For example, use a storage ottoman as a seat and a place to store blankets, pillows, or seasonal clothing. Consider a bed with built-in drawers or a sofa that can double as a bed for guests. Compact furniture is an excellent solution for tiny homes, as it can serve multiple purposes.

  • Foldable Furniture: Look for foldable tables, chairs, or even storage containers that can easily collapse when not used.
  • Storage Bins and Baskets: Store clothes, shoes, or other seasonal items in storage bins. These can be stacked or slid under the bed, placed in closets, or hidden behind curtains.

Declutter Regularly

To maintain an organized home, it’s vital to declutter regularly. This ensures that you don’t accumulate unnecessary items over time, which can lead to more clutter. It’s easy to forget what you have and where it’s stored, so be sure to go through your belongings periodically and get rid of anything you no longer need. Consider donating unused furniture, books, or clothes to make room for what you use and need.

4. Additional Storage Solutions

If you still find that your tiny house lacks enough storage, consider renting a storage unit. Storage units come in different sizes and many offer climate-controlled options to ensure the safety of your belongings. Whether you need short-term storage while decluttering or long-term storage for items not in daily use, a storage unit can provide the extra space you need.

Storage Unit Considerations

Before renting a storage unit, consider the following:

  • Storage Size Guide: Make sure you choose the storage unit of the right size for your needs. Most companies offer size guides to help you determine how much space you need.
  • Short-Term vs Long-Term Storage: A short-term storage unit may suffice if temporarily decluttering your house. However, a long-term unit could be more cost-effective if you’re looking to store seasonal items or things you don’t use often.
  • Climate-Controlled Storage:
  • Climate-Controlled Storage: For sensitive items like books, electronics, or family heirlooms, a climate-controlled storage unit is the best option. This ensures that the temperature and humidity levels are regulated to prevent damage.

Conclusion

Organizing a small house without storage doesn’t have to be daunting. You can create a functional and tidy home by implementing these storage solutions, decluttering regularly, and maximizing every inch of available space. There are many ways to organize your home effectively, from closets and kitchen cabinets to creative storage solutions and storage units.

For those needing additional storage, McDowell Mountain Community Storage offers reliable, convenient, and accessible options for your overflow items. Whether you’re storing seasonal clothing, extra furniture, or just need more space, they have the perfect solutions to help you declutter and stay organized.

The key to maintaining an organized home is to keep track of your belongings and use smart, efficient storage techniques. Whether you invest in multifunctional furniture, wall-mounted shelves, or storage units, there are plenty of ways to make your small house feel spacious and clutter-free.

With the right mindset and organizational tools, you can live comfortably in your small house without feeling overwhelmed by clutter and disorganization.

Power Tool Storage Ideas: Maximize Space in Your Self-Storage Unit

Let’s delve into power tool storage ideas. Whether for personal use, professional work, or a home renovation project, maintaining the organization and accessibility of power tools can be challenging. If you use a self-storage unit to store your toolbox, cordless tools, and air tools, optimizing the available space with a neat and tidy arrangement is essential. This ensures that items like drills, drivers, and pieces of PVC are securely stored and easily accessible. Consider using dividers, a compact and portable charging station, and a layout that incorporates a drill press or plywood board for larger items. You can also add options like a drawer system to keep everything in place. With the proper setup, you can prevent mess and ensure that everything, from DeWalt tools to various projects, has its place.

Make Use of Wall Space with Pegboards

Utilizing vertical space is one of the most effective methods for storing power tools in a self-storage unit. Pegboards are an excellent solution for storing smaller tools, such as screwdrivers, saws, and drills. You can maintain the organization of your storage unit by installing a pegboard on the walls and utilizing hooks, baskets, and shelving on the side and front of the unit. This not only conserves space but also facilitates the retrieval of necessary instruments without needing to search through boxes or bins, ensuring that you can easily access all your tools with much less hassle.

Install Shelving Units

Shelves are indispensable for storing more extensive power tools and their accessories. Adjustable shelving units are optimal because they can accommodate tools of varying sizes and weights. Power saws, drills, and sanders can be securely stored on shelving, while smaller accessories such as batteries, chargers, and tool belts can be stored in labeled bins on the same shelves. Tool boxes are an excellent option for organizing everything for cordless tools and other smaller items. This method ensures that all your stuff, from a bunch of drills to many accessories, is readily accessible and organized, maintaining a clutter-free unit.

Use Tool Chests or Cabinet

Tool chests or cabinets are ideal for organizing many minor parts and accessories. These storage units are equipped with numerous drawers and compartments, which facilitate the organization of screws, nails, drill bits, and other tiny items. Some tool chests are even equipped with a lockable feature, providing additional security for their valuable equipment.

Containers and Bins That Can Be Stacked

Stackable receptacles and containers are an excellent alternative for individuals with restricted wall space. These containers are available in various sizes and are ideal for assembling similar instruments, such as drills, drivers, and other tools from your shop. Label each bin with its contents to identify the necessary instrument without opening each container. This system will help you maintain an organized space and give your storage area a neat look. Stackable containers also maximize the floor space in your self-storage unit by enabling you to store more without occupying additional space, as they can be stacked vertically, making it easier to organize your tools, whether for your shop or house.

Hanging Storage for Corded Tools

If not stored correctly, corded power tools can consume significant space. To store your corded tools, it is advisable to utilize wall-mounted racks, hooks, or holders. This prevents the cords from becoming entangled and helps to clear floor space. Extension cables and power strips can be stored in wall-mounted containers or hanging baskets, which is a great option to ensure that they are organized and out of the way. This idea helps maintain a tidy and efficient workspace.

Create a Tool Cart for Mobility

Consider purchasing a mobile tool cart if you frequently require access to your tools. These trolleys are designed with wheels, which facilitate the transportation of your tools from one location to another. When the cart is not in use, it can be rolled into your self-storage unit, where you can store your power tools and accessories. This approach is particularly advantageous when one maintains an extensive assortment of instruments or requires consistent access.

Protect Tools with Soft Storage Bags

Soft storage bags, such as electric drills or power saws, can safeguard instruments susceptible to moisture or dust. These bags fit over tools and protect them from the elements while stowed in your unit. To prevent moisture accumulation, which could result in rust or corrosion, selecting bags constructed from durable, permeable fabric is recommended.

Label Everything

It is essential to maintain order when storing electrical tools in a self-storage unit. Labeling each box, bin, and shelf allows the contents to be swiftly determined without opening them. A labeling system that incorporates factors such as tool type, size, or frequency of use can be implemented to facilitate the identification of specific tools when they are required. You can use a sheet of labels for each section, ensuring that the rest of the materials and tools are easy to locate. With this system, each piece of equipment will be organized, whether part of your plans or just something you need to grab quickly. This options menu will help you manage your room and storage space more efficiently, ensuring everything is in its proper place.

Consider Climate Control for Sensitive Tools

Some power tools, particularly those that contain electrical components or batteries, may be susceptible to extreme temperatures or humidity. If your current unit is not climate-controlled, consider renting a self-storage unit with temperature and humidity control. This will extend the lifespan of your tools and ensure that they remain in optimal working condition by safeguarding them from harm caused by moisture, heat, or cold.

Create a Unique Storage Solution

If you maintain a substantial collection of power tools, developing a personalized storage solution tailored to your specific requirements may be advantageous. You can employ a professional to construct custom shelving, racks, or cabinets specifically designed to accommodate the size and shape of your instruments, such as drivers and others. This guarantees that each item, including casters and work bench tools, is assigned a specific location, keeping them organized and preventing damage. By ensuring that tools are stored separately from each other, you can maintain a neat and efficient storage space that looks good and works effectively.

Understanding Power Tool Storage Ideas in Scottsdale, Arizona at McDowell Mountain Community Storage
Power Tool Storage Ideas in Scottsdale, Arizona at McDowell Mountain Community Storage

Conclusion

Implement innovative storage solutions to optimize the space in your self-storage unit while maintaining the organization of your power tools. Numerous methods ensure the safety and accessibility of your tools, including wall-mounted pegboards, shelving, stackable bins, and tool carts. For example, incorporating tool holders for impact drivers, angle grinders, and grinders can maximize your workspace. A well-organized tool cabinet or toolbox can store everything in one place. With a well-thought-out design and plan, such as a workbench or dedicated area for DIY projects, you can store many tools, including battery-powered tools, and ensure that your garage or workshop remains clutter-free. By employing these storage strategies, you can optimize your self-storage unit and guarantee that your tools are consistently accessible when required.

Frequently Asked Questions

How can I prevent the rusting or corrosion of instruments in a self-storage unit?

To prevent oxidation and corrosion, storing your tools in a climate-controlled, dry location is recommended. Additionally, you may implement moisture-absorbing packets or silica gel packs in your storage containers to mitigate humidity. A thin layer of oil or lubricant can be applied to metal-part instruments to safeguard them from moisture.

What are the most effective storage solutions for large, bulky instruments such as generators or power washers?

Consider utilizing large, durable shelving units or positioning them in specified corners of the unit for extensive, bulky tools such as power washers or generators. Additionally, consider purchasing wheeled storage racks or carts to facilitate the movement of these substantial instruments throughout your unit. To prevent moisture damage, ensure that they are stored off the floor.

Can I utilize a tool storage system to organize my tools in a self-storage unit?

Indeed, a dedicated tool storage system, such as a mobile tool chest or modular tool storage unit, is an excellent method for organizing your tools in a self-storage unit. These systems are intended to accommodate various tools and accessories and can be effortlessly relocated within the unit and out when required.

What is the most effective method for storing power instruments with safety features, such as drills or saws?

Store tools with safety features, such as drills or saws, with their safeguard mechanisms activated. For instance, it is crucial to cover saw blades and store drills with safety switches in the off position. Utilize protective cases or covers to prevent accidental activation or damage.

How can I maintain the organization of my self-storage unit as I accumulate additional instruments over time?

As your tool collection expands, regularly evaluate and rearrange your self-storage unit. Ensure you employ efficient storage solutions, such as adjustable shelving, pegboards, and labeled containers. If additional shelves or storage units are required, donate or sell any tools that are no longer in use to make space for new ones.

Is storing power instruments that require repair in a self-storage unit permissible?

Indeed, it is permissible to store power tools that require repair; however, it is crucial to ensure that they are stored safely and organized. Store them in bins or boxes to prevent additional damage and maintain a clear separation from working instruments. Label them with a note specifying the necessary repairs to prevent them from being overlooked.

What are the best methods for storing power instruments that are not frequently used?

Consider storing tools used infrequently in labeled containers or tool chests and placing them at the rear of your self-storage unit. Ensure they are in excellent working order by inspecting them and using protective covers or cases.

What is the most effective method for storing power instruments over an extended period?

Before storing your instruments for an extended period, ensure they are cleaned and maintained appropriately. To safeguard them from moisture and grime, remove the batteries, lubricate the moving parts, and store them in protective bags or cases. If feasible, store the tools off the ground and use a climate-controlled unit. Additionally, moisture damage should be avoided.

How can I enhance the security of my storage unit for high-value electrical tools?

To enhance the security of your high-value tools, it is advisable to utilize lockable cabinets or tool chests. You may also install a security camera in your self-storage unit or purchase a high-quality safeguard for the unit’s door. Some self-storage facilities provide enhanced security features like access control systems and 24/7 surveillance.

What are some space-saving ideas for storing large extension cables and hoses?

Use wall-mounted cord reels or storage pegs to organize extension cords and hoses and conserve space. Additionally, they can be precisely coiled and stored in large bins or baskets. Label each cord with its length and type to facilitate identification in an emergency. 

Expert Tips on How to Properly Store Power Tools in a Self-Storage Unit

Power tools may appear straightforward to store in a self-storage unit; however, it is crucial to implement the appropriate procedures to preserve their condition. At McDowell Mountain Community Storage, we provide secure, climate-controlled facilities to safeguard your tools from moisture, extreme temperatures, and other detrimental environmental factors.

To maintain the optimal condition of your tools, it is recommended that you use toolcases or wrap them in protective covers to shield them from dust and pests. Handle your instruments with care when transporting them to prevent accidental damage. Arrange your tools in tool chests or bins to prevent wear and strain.

Store your tools on vertical surfaces to optimize space and safeguard them when feasible. Smaller tools, such as screwdrivers, saws, and drills, are best accommodated by wall-mounted racks and pegboards. For larger equipment, such as power washers or generators, use durable storage units to keep them off the floor and prevent moisture accumulation. This ensures your tools, from a set of drills to a couple of grinders, are easily accessible and in optimal working condition.

At McDowell Mountain Community Storage, we recognize that each tool has distinct storage requirements. Whether you’re storing hand tools or large machinery, we offer a variety of unit sizes to suit your needs. Our team can assist you in selecting the right unit for your tools, ensuring that each one is stored correctly and remains in top condition.

We offer secure, clean storage options with 24/7 surveillance for short-term and long-term safety. Contact us today to reserve your unit and discover the most effective power tool storage solutions. No matter the season or storage duration, McDowell Mountain Community Storage ensures your instruments stay in optimal condition.

How to Store Christmas Decorations

Storing Christmas decorations can sometimes feel like a monumental task. Every year, we collect more ornaments, wreaths, garlands, and festive decor, making it a challenge to keep everything in top condition for the next holiday season. With some planning, proper storage solutions, and creative organization, you can ensure that your decorations are easy to access, in excellent condition, and ready to bring holiday cheer to your home again. It’s essential to sort and categorize your decorations to preserve their condition, and using shelves or bins can help keep everything tidy and organized. By dedicating a bit of time to properly storing your items, you’ll have more room in your house and less hassle when decorating. A helpful tip is to group similar things and label containers accordingly. By organizing your decorations in a way that makes sense for your space, you’ll avoid wasting time looking for specific items next holiday season. Here’s a comprehensive guide to storing Christmas decorations, from wreaths and ornaments to lights and trees. 

Choosing the Right Storage Containers

The key to success when storing Christmas decorations is choosing the right containers. Proper storage is essential to maintaining the quality of your items. Whether you have delicate ornaments, lights that easily tangle, or a large artificial tree, your storage containers must be sturdy, organized, and capable of protecting your items.

Start by selecting bins, boxes, or bags that suit the size and type of your decorations. Clear plastic bins are an excellent option for most Christmas decorations because they allow you to see the contents without opening them. This can save you time when searching for specific items next year. Additionally, clear bins are less likely to absorb moisture, which could cause damage to your decorations.

For especially fragile items, such as glass ornaments or delicate figurines, consider using padded boxes or containers designed specifically for fragile goods. These often come with dividers or soft padding to cushion your items and prevent them from breaking. Wrapping your items in tissue paper or bubble wrap before storing them in these containers will add an extra layer of protection.

Another key consideration is size. Choose large enough containers to hold your decorations without forcing them in too tightly. When items are packed too densely, they are more likely to get damaged, bent, or squished. On the other hand, containers that are too large may allow your items to shift and move around, which could lead to breakage.

Wrapping Fragile Decorations

Specific Christmas decorations, such as ornaments, figurines, and glass tree toppers, require special care during storage to avoid damage. Wrapping these items in tissue paper or bubble wrap before placing them in their containers is essential for preserving their condition.

Bubble wrap is an excellent material for fragile items because it offers cushioning and protection against impact. For ornaments, you can either wrap them individually or nest several ornaments together in layers of bubble wrap, ensuring that the wrap covers every exposed surface. Be sure to fill any gaps inside the container with additional packing materials, such as crumpled tissue paper, to prevent the items from shifting during storage.

In addition to bubble wrap, tissue paper can be used to wrap delicate wreaths, garlands, and other decor items. It’s soft and won’t scratch surfaces, making it ideal for storing decorative elements. For larger items, like wreaths, you can use a garment bag or large plastic storage bag to protect them from dust and dirt.

For particularly fragile pieces, such as heirloom ornaments or collectible decorations, consider placing them inside a sturdy box with a layer of padding at the bottom. For extra peace of mind, some companies sell ornament storage boxes with dividers to keep each ornament safely separated from the others.

Storing Christmas Trees

Proper storage is crucial for maintaining the shape and condition of artificial Christmas trees. Because they tend to be bulky, you’ll need a dedicated space for storing them, such as your attic, basement, or garage.

If your tree comes with a storage bag, use it to protect the tree from dust and dirt while it’s stored away. Many tree bags are large enough to accommodate the tree’s branches and are designed to keep the tree’s shape intact. Be sure to store the bag in a superb, dry location, as extreme temperatures or moisture can damage the tree and its storage bag.

If your tree didn’t come with a storage bag, you can purchase a custom one or create your own using plastic sheeting or a large garbage bag. Ensure the bag is securely tied to prevent moisture from entering and keep dust out. If your tree is in pieces, consider storing each section in a separate bag or box to keep it organized and easy to assemble when ready to set it up again.

Proper storage is optional for real Christmas trees since they’re usually discarded after the season. However, if you want to store a real tree for another use, keep it in a cool area with plenty of water to prevent it from drying out. Consider trimming the branches and placing the tree in a water container until next year’s holiday.

Store your holiday decor with McDowell Mountain Community Storage in Scottsdale, Arizona.
Discover effective ways to store Christmas decorations with McDowell Mountain Community Storage in Scottsdale, Arizona.

Organizing by Category

One of the best ways to organize your Christmas decorations is by category. By grouping similar items, you can save time and avoid frustration when setting up your decorations next year. Whether you have a collection of Christmas tree ornaments, garlands, or string lights, organizing everything by category ensures everything is in its place.

Use separate bins or boxes to store each type of decoration. For example, you could designate one bin for ornaments, another for tree lights, and a third for wreaths and garlands. When you store each item by type, it’s much easier to find what you need when it’s time to decorate.

Label each container with the type of decorations it holds. You can do this with simple masking tape and a permanent marker, or you can use a label maker to create neat, professional labels. Labels should include a description of the contents, such as “Christmas Tree Ornaments” or “Holiday Lights,” so you can quickly identify what’s inside without opening every box.

Consider using garment bags or large storage bags to keep large items like wreaths and garlands clean and intact. You can also use dividers to separate items within larger containers. For example, a large storage bin could hold several smaller items, such as tree toppers, garlands, and ornaments, as long as the dividers keep them separate and protected.

Storing Christmas Lights

Christmas lights can be one of the trickiest items to store, especially if they tend to tangle or get damaged easily. Fortunately, you can use a few tricks to keep your lights organized and tangle-free.

The best way to store Christmas lights is by wrapping them around a spool or reel. This keeps the lights neatly coiled and prevents them from tying during storage. You can buy a special light reel or make your own using a cardboard spool or a plastic hanger. If you have multiple strings of lights, label each one to indicate where it goes, such as “Outdoor Lights” or “Tree Lights.” Storing your lights on a shelf in your office or storage room ensures they stay in one place, minimizing the risk of them getting lost or mixed up with other decorations.

Place the wrapped lights inside a small storage bin or bag for extra protection. This will help protect the lights from dust, moisture, and other potential damage. If you store your lights in a cardboard box, ensure the box is dry and moisture-free to prevent the lights from rusting or corroding. Keep the storage box or bin in a spot that is easy to access but not in the way of daily use, such as in the corner of a closet or under the bed. This way, you can store your lights out of the way without creating a mess. Make sure that the handles or wheels of your storage containers are easy to use, making getting the items in and out of storage much more convenient. This simple solution allows anyone to store their lights with minimal effort and maximum organization, bringing joy to the process. If you’re sharing your storage method, consider writing a blog post to offer tips and help others solve the same problem—sometimes, the most minor things make a big difference!

Storing Holiday Decor

Holiday decor like wreaths, garlands, and festive figurines require storage solutions to ensure they stay in great shape from year to year.

Wreaths, for instance, can be stored in a variety of ways. You can hang them on a coat hook in a closet, store them in large plastic bags, or place them in special wreath storage boxes. These storage boxes are available at most home goods stores and are designed to protect wreaths from being crushed, bent, or damaged. If you have a staircase, it’s a good idea to store wreaths in an area off to the side and not in the way of your stairs or other high-traffic areas. It’s essential to plan your storage and ensure you have the right products, such as packaging materials, to protect your decor. You can use tote bags or plastic bins for garlands and other decorations, which helps keep them safe from dust and damage.

Garlands can be stored the same way as wreaths—by hanging them or placing them in a storage bag. Alternatively, you can store garlands in clear plastic bins, ensuring heavier items do not squash them. To make things easier, you can label each container or tote with a lid to indicate the contents, whether garlands, candles, or even your Santa figurines. This way, you can quickly identify where your items are stored without going through multiple shelves or boxes.

Smaller holiday decor pieces, such as figurines, candle holders, or nativity sets, can be stored in bins or boxes with dividers. Be sure to wrap each item individually in bubble wrap or tissue paper to avoid damage during storage. When packing away your presents or other miniature holiday decorations, keep them organized in a way that makes sense for your space. You could also use your kitchen shelves for items like candles, which are easily organized in bins or containers. If you’re sharing your storage tips on social media, consider including affiliate links to the products you recommend, such as packaging or storage containers, to help others find what they need.

Storing Christmas Stockings

Christmas stockings can be essential to your holiday decor, and storing them properly helps retain their shape and condition. You can store stockings in a small bin or tote or hang them in a closet if you have the space. If you have several stockings, using a storage bag to keep them together is a good idea. Label the bag or bin to identify where your stockings are stored for next year easily. You can even organize your stockings based on sizes and colors, making it easier to find the right one when decorating next holiday season. While at it, consider taking a picture of the contents inside the bag for a quick visual reference, especially if you’re storing other holiday stuff in the same container. Some people share their stocking storage tips on social media so that you can get ideas from your friends on Instagram or Pinterest. 

If you have a collection of stockings in different styles or designs, storing them in separate containers to preserve their shape and condition, much like you would with your favorite recipes or photos, is good. You can reply to comments, share suggestions about your storage methods, and even suggest how to keep things organized in the future. Whether you’re storing stockings with reindeer designs or keeping track of sale items from your village shopping trips, having lids and labels for your containers ensures that everything stays neat and easy to access. 

Storing Other Holiday Items

Many other holiday items need proper storage. These could include tree skirts, holiday-themed pillows, gift bags, wrapping paper, and more. Wrapping paper, for example, can be stored in tall tubes to keep it from getting bent or creased. Gift bags can be folded and stored in clear plastic bins, while decorative pillows can be placed in storage bags or bins. Garland can be stored in a tree bag, which provides a lot of storage space and helps keep it from getting tangled. Consider using small plastic containers with compartments to organize small items like bows, ribbons, and wrapping accessories. 

This system allows you to store everything in one place, so you don’t have to search through multiple boxes to find the right size ribbon or a specific type of bow. Use posts to label your storage containers and make it easy to identify the contents. Organizing everything in a consistent and neat style will save you time and effort next season. Additionally, you can share your storage ideas and experiences with others on social media platforms like Instagram, where a couple of posts about your storage methods might inspire others. Whether organizing your mantel decorations or storing a piece of greenery, thoughtful organization will make the process easier. 

Conclusion

Storing your Christmas decorations doesn’t have to be a stressful experience. Using the proper containers, carefully packing fragile items, and organizing your decorations by category ensures everything stays in good condition for the next holiday season. Whether you’re storing your decorations in your attic, basement, or garage, the key is to be organized and to use the appropriate storage solutions to keep your items safe, clean, and easily accessible. McDowell Mountain Community Storage offers a variety of storage options to help keep your holiday decor secure. Pinterest is a great place to find inspiration and ideas for storing and organizing holiday decorations. Many people share creative ways to keep things tidy, from storing ornaments in labeled boxes to using bins for garlands and lights. These tips will help you make the most of your space, whether organizing an extensive collection or just a few special ones. By following these suggestions, you can preserve your decorations in a way that makes decorating for the holidays much more manageable. Happy decorating and organizing!

Contact Us
For more information on storage options or assistance with your holiday storage needs, feel free to Contact Us at McDowell Mountain Community Storage! We’re here to help.

How to Clean Out a Storage Unit?

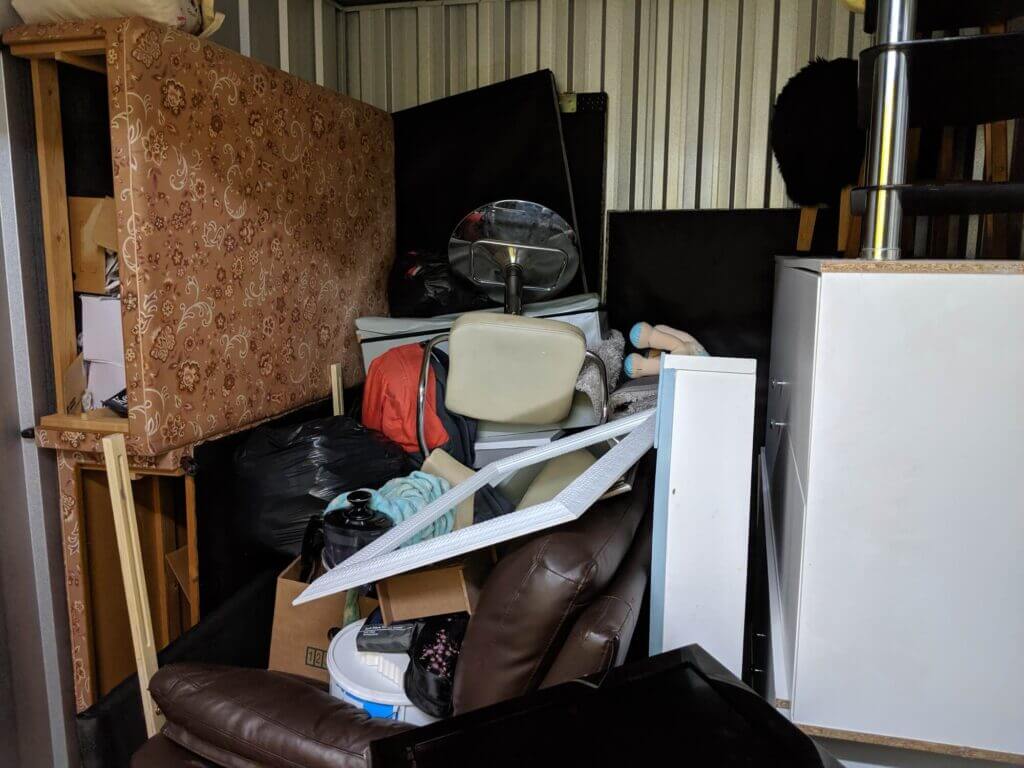
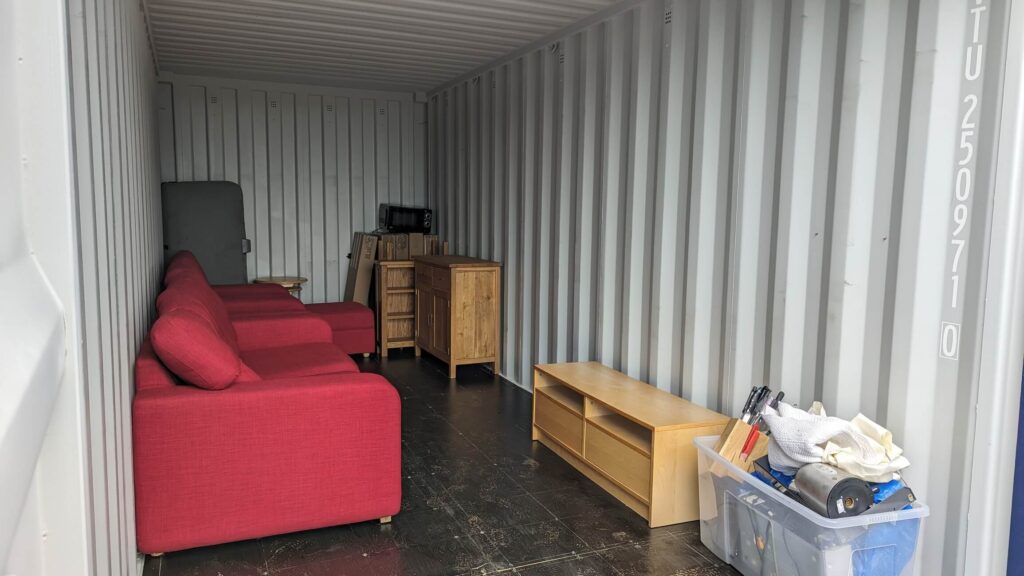
How to clean out a storage unit? Cleaning out a storage unit can be daunting, particularly if it is overflowing with items accumulated over months or even years. This guide will assist you in effectively completing the task and optimizing the available space, regardless of downsizing, relocating, or simply decluttering.

Plan and Prepare

Planning and preparation will make the process smoother and more efficient before clearing your storage unit. How to commence:

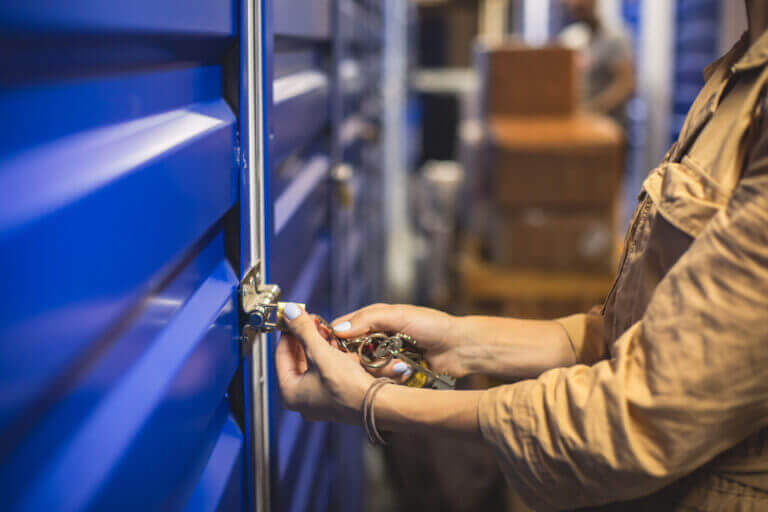
Please Verify your Lease

Please review your storage unit lease agreement to ensure you know of any policies or regulations concerning the unit’s departure. In certain facilities, you may be required to sanitize the unit to a specific standard or inform them in advance if you intend to empty it. The following information will help you prevent any unexpected charges.

Clarify Objectives

Ascertain the rationale for the unit’s purging. Have you considered reducing the number of items in storage, eliminating them, or simply reorganizing them? Maintaining a well-defined objective is beneficial for maintaining concentration throughout the process. You may determine that certain items are worth retaining while others should be sold, donated, or disposed of.

Allot Time

Cleaning out a storage unit may require more time than anticipated, mainly if overloaded. Make sure to allocate sufficient time in your calendar to prevent the sensation of being hurried. If confronting a large or multiple units, think about dividing the task over a few days.

Amass Materials

It will be significantly more straightforward to organize and pack when the appropriate supplies are available. Here is a list of potential products that you may require:

  • Garbage containers for those items that will be discarded
  • Boxes or containers for items are kept, donated, or sold. Labels and markers to categorize and label boxes
  • Wearing gloves to safeguard your hands is particularly important if the unit has been inactive for an extended period.
  • Disinfectant clothes, brooms, and other cleaning supplies are required to maintain the cleanliness of the unit as you progress.
  • Use a cart or trolley to transport heavier items.

Developing an Inventory Checklist

Before commencing, make a brief mental or written inventory of the unit’s contents. This will assist you in determining the appropriate categories (keep, sell, donate, and discard) and constructing a plan for managing various items, particularly those that are valuable or large. 

Arrange Items

When you are prepared and ready to commence, the subsequent phase is to organize and categorize the items in your storage unit. This stage is entirely dedicated to categorizing, which enables you to make a systematic decision regarding which items should be retained, discarded, or disposed of. An approach to this matter is as follows:

Develop Categories for Sorting

Clear categories should be established for all unit items to maintain organization and minimize decision fatigue. Start by utilizing these frequently encountered categories:

  • Hold onto items you intend to utilize in the future or currently require. If these items are to be returned to storage or your residence, they should be meticulously repacked and labeled.
  • Donate: Items that are in good condition and no longer required but could be helpful to others. Consider scheduling a donation pickup and preparing boxes or containers for these items.
  • Items no longer benefit you but still hold value and can be sold. List these items together to facilitate an online sale or yard sale later.
  • Recycling/Trash: Any item that is no longer functional, damaged, or broken should be recycled. Waste bags should be readily available, and metal, paper, or electronics should be recycled whenever feasible.

Starting from the front

To begin, clear the area near the front of the storage unit and gradually progress to the rear. This method generates additional space as you progress, simplifying the process of accessing and organizing other sections.

  • A group of items that are similar in
  • As you proceed through your possessions, organize similar items. To illustrate:
  • One section for clothing
  • Furniture and substantial objects are found in other locations.
  • A distinct area is designated for books and media.
  • Collection of seasonal objects, such as winter gear or holiday decorations, in a single location

This will facilitate the organization of your affairs and the ability to make decisions faster. In addition, it will facilitate repacking if the items are to be stored again.

Establish a reserve for items that are large or awkward

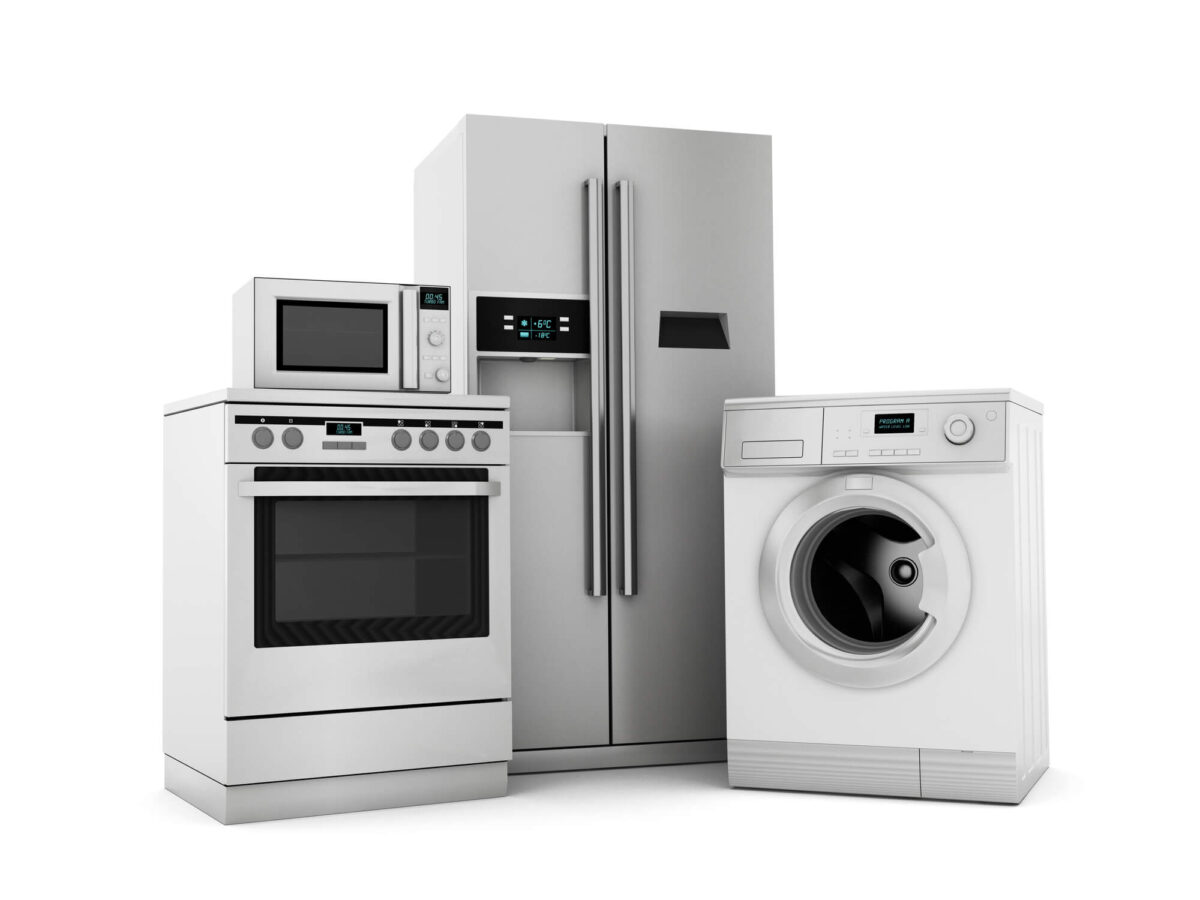
If your storage unit contains cumbersome furniture or large items such as appliances, put them aside. Decide whether you will retain, sell, or donate them. However, keep them for the last, as they may require additional equipment or transport effort.

Checkboxes and bags

Opening any sealed boxes or containers and thoroughly examining the contents is advisable. You may find items that need to be addressed or that you no longer require. Make sure to repack only the essential items and designate each item.

Apply a system of labeling

As you organize your possessions, implement a labeling system to indicate the destination of each item. Use sticky notes or write directly on boxes to indicate whether an item is intended for storage, donation, sale, or personal use. Once you are prepared to remove items from the unit, this will simplify the process of managing everything. 

Implement the 80/20 Rule

The Pareto Principle, or the 80/20 Rule, can be a game-changer when clearing out a storage unit. It implies that 20% of the effort yields 80% of the results. This rule prioritizes the most significant or impactful items in decluttering, expediting and optimizing the process. The 80/20 Rule can be effectively implemented during the cleaning of a storage unit as follows:

  • Identify Items of Significant Impact Initially, concentrate on the 20% of items that are the most valuable regarding emotional significance and usefulness or occupy the most space. This method expedites the process and provides a sense of accomplishment at the outset.
  • Clearing out furniture or oversize, bulky items is a simple starting point, as it creates significant additional space.
  • It is imperative to prioritize the careful packing or moving of valuable or sentimental items, such as family heirlooms, essential documents, or high-value electronics.
  • Make prompt decisions regarding the remaining items.
  • Once you have addressed the most critical items, apply the rule to 80% of your possessions. Although this section may include numerous items that could be more critical or of lesser importance, it is unnecessary to devote excessive time to each one. Utilize your categorizing categories (keep, sell, donate, trash) to facilitate rapid decision-making.

Dispose of Items That Are Not Essential

Frequently, we refrain from disposing of unnecessary items due to their storage. The 80/20 rule assists in recognizing that the majority of the items you are storing may no longer be necessary. Question yourself:

  • When was the last time I utilized this?
  • Can I utilize it once more?
  • Is it of monetary or sentimental value?
  • Consider selling, donating, or abandoning the item if the response is negative.
  • Concentrate on the 20% that is truly necessary.

After applying the 80/20 rule, you likely have only the genuinely significant items. These items are either valuable regularly or add value to your existence. They are valuable for future use and should be repacked and organized appropriately.

Remain focused on adhering to the rules.

While decluttering, it is effortless to become engrossed in minute details or become distracted. The 80/20 rule ensures that you remain attentive to the overarching objective. Suppose you are unable to make a decision. In that case, it is essential to remind yourself that the objective is to address the most significant items first and progress through the remaining items rapidly. Concentrating on the genuinely significant items and reducing the time spent on less important items will help you clear out your storage unit more efficiently, saving time and energy. 

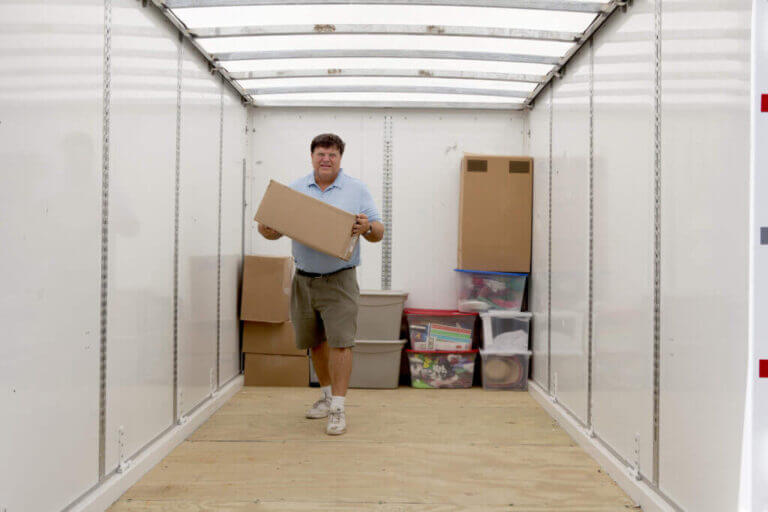
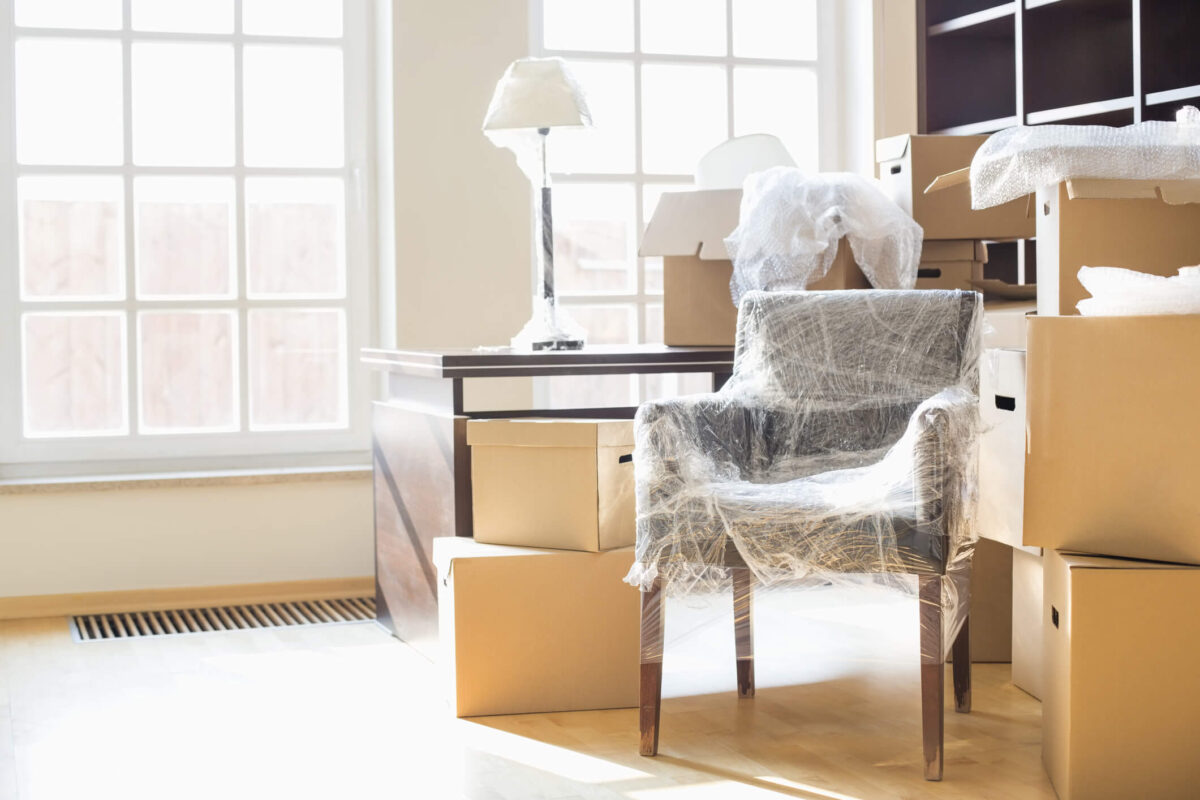
Label and Pack Boxes

It is now time to concentrate on packing and labeling your boxes after you have sorted through your belongings and determined which items to retain, sell, donate, or discard. Proper labeling and packaging will facilitate the organization, storage, or relocation of your possessions and the subsequent retrieval of items without opening each box. The following is an effective method for achieving this:

Pick the Appropriate Boxes

Utilize boxes that are suitable for the specific products and are of a sturdy construction:

  • It is recommended to use smaller boxes for heavy items such as books or tools to prevent them from becoming too heavy to transport.
  • A larger box is recommended for lightweight items such as apparel, linens, or pillows.
  • Clear bins are an excellent choice to observe a container’s contents without uncovering them.

Boxes are specifically designed for delicate or fragile objects, such as dish boxes for glassware or wardrobe boxes for clothing.

Arrange items by category or room

To maintain order, store items according to their category or room allocation:

  • A single set of crates contains kitchen items.
  • In another location, clothing and linens are stored.
  • Items that are decorative or seasonal are packaged separately.

This approach will facilitate the unpacking process if you intend to relocate items to your residence or another storage facility at a later date.

Utilize protective padding

Ensure that fragile items, such as electronics, glassware, or collectibles, are adequately safeguarded during the relocation:

  • Wrap fragile items in bubble wrap, packing paper, or even garments.
  • Position denser items at the bottom of the box and lighter and more delicate at the top.
  • Dividers are an option for fragile objects, such as glass.
  • Boxes Must Be Securely Sealed

After packing, securely seal your crates with robust packing tape. Apply tape to the box’s borders and top and bottom seams to enhance durability and ensure the box does not open during transport.

Identify the boxes

Labeling is essential for determining the location of all items after the boxes have been packaged. The following is a method for labeling that is effective:

  • Content-based labeling: Write a concise description of the carton’s contents, such as “winter clothing” or “kitchen utensils.”
  • Room-specific labeling: Please specify the location of the items, such as “living room,” “bedroom,” or “garage.”
  • Utilize color-coded labels: Colored markers or stickers can be used to organize crates by category or room visually.
  • Indicate that the crates are fragile: Label the box “FRAGILE” in bold letters and use arrows to indicate which side should be faced up if it contains delicate or breakable items.
  • Incorporate the following dates: To ensure that you are aware of the duration of storage, include the date on which the box was packaged for long-term storage.

Set a higher priority entry

Consider the urgency with which you will require access to specific items when packaging them for storage. For instance,

  • Items that are frequently used, such as seasonal decorations or critical documents, should be stored in cases that are easily accessible and clearly labeled.
  • Items not frequently used, such as old memorabilia or additional household items, can be stored in a deeper section of the unit.

Arrange Containers Effectively

If you are preparing the crates for storage, you should:

  • Place heavier crates at the bottom and lighter ones at the top to prevent crushing any items.
  • Ensure that the identifiers are oriented outward to facilitate reading.
  • If space permits, establish aisles to facilitate access to items without the need to relocate everything.
  • Utilize inventory lists

Generating an inventory list for each package, including the primary contents, may be beneficial. You have two options: attach the list to the box’s exterior with adhesive or maintain a digital inventory for convenient reference. Mystically, packing and labeling your crates will simplify organizing, storing, or moving and avoid confusion. It also ensures you do not have to unpack everything to locate a particular item later. 

Spotless the Unit

The subsequent critical phase is the comprehensive cleaning of your storage unit after sorting, packing, and removing all items. This guarantees that the space is left satisfactorily and may prevent the facility from imposing supplementary fees. The following is a method for cleaning the unit effectively:

Eliminate all items before cleaning:

  1. Verify that the storage unit is entirely vacant.
  2. Look for any remaining debris, garbage, or belongings in every corner, shelf, or hidden space.
  3. Ensure all items, including those you intend to dispose of, are removed.

Vacuum the Floors

Begin by sweeping the entire floor of the unit:

  • Utilize a durable broom to eliminate any debris, grime, or dust that may have accumulated over time.
  • Sweep the entire area, including the corners and the edges of the walls, where dust and debris are prone to accumulate.
  • If the floor is filthy, it may be necessary to sweep it multiple times to ensure it is spotless.

Clean Surfaces

Ensure that any surfaces, including shelves and countertops, in your storage unit are cleaned:

  • Clean surfaces that may have accumulated grit or grime using a disinfectant wipe or damp cloth.
  • Scuffs or traces on the walls should be gently scrubbed with a cleaning solution to eliminate them.

Inspect for Pests

During the cleansing process, be vigilant for any indications of pests, including droppings, nests, or damage to boxes and personal property. If you observe any concerning information:

  • Inform the facility management immediately, as they may need to resolve a vermin issue.

Resolve Spills or Stains

If there are any visible marks, spillage, or stains on the floor

  • Scrub away stains by combining a mild detergent or cleaning solution with tepid water.
  • To address more challenging areas, employ a sponge or brush to apply the cleaning solution to the floor.
  • Be sure to eliminate any adhesive residue or liquid to prevent mold or mildew growth.

Properly Dispose of Waste

Collect all debris, refuse, and discarded items as you clean:

  • Collect and transport waste to the facility’s designated refuse or recycling area using heavy-duty trash bags.
  • Dispose of large or hazardous items (e.g., electronics or appliances) by local regulations.

Check for any Final Touches

Conduct a final inspection of the unit to ensure that no details were overlooked following the cleansing process:

  • Guarantee that no personal possessions, trash, or items are left behind.
  • Ensure that the floor is clean, all surfaces are wiped down, and there are no visible traces of damage.

Maintain the Unit in an Acceptable Condition

  • If the storage facility mandates that the unit be returned in a specific condition, as outlined in your lease agreement, ensure that you have fulfilled all the requirements. Certain facilities may impose fees if the unit needs to be cleaned, damaged, or cluttered with unwanted items.
  • By conducting a comprehensive cleaning of the unit, you guarantee it will be pristine for the subsequent tenant and prevent any potential additional fees. Additionally, it can enhance your relationship with the storage facility and facilitate the move-out process. 

Trash Disposal

Trash Disposal

After cleaning and organizing your storage unit, you will likely accumulate many unwanted items and garbage. It is essential to dispose of garbage in an environmentally responsible manner and to avoid violating the storage facility’s regulations. The following is a comprehensive guide to the effective dispersal of trash:

Arrange Your Garbage

Sort through the garbage and identify distinct categories before disposal:

  • Regular trash includes unused or hazardous items, such as old or damaged domestic goods, packaging, and non-usable possessions.
  • Recyclables: Items like cardboard, paper, plastics, and recyclable metals.
  • Hazardous Materials: Batteries, electronics, chemicals, or any other substance necessitating unique disposal procedures.

Utilize heavy-duty trash bags

To collect and contain your waste, utilize heavy-duty trash bags for regular garbage. Ensure that the bags are sufficiently durable to accommodate sharp or unwieldy objects without tearing:

  • Double-bag fragile or heavy items are recommended to prevent spills or leakage.
  • Tie the bags securely to prevent the contents from spilling out during disposal.

Wherever feasible, recycle

Separate recyclable items from regular trash:

  • Ensure that the storage facility has designated areas for recyclables or recycling receptacles. Bins for metals, plastics, and paper are prevalent in numerous locations.
  • If recycling services are unavailable at your facility, please transport the items to a local recycling center or drop-off location.

Safely Eliminate Hazardous Waste

Special precautions must be taken when handling hazardous substances such as paint, cleaning chemicals, electronics (e-waste), batteries, or outdated appliances:

  • E-waste recycling centers are the appropriate location to dispose of outdated electronics, including televisions, laptops, and smartphones. Recycling programs for these items are available at numerous local electronics retailers.
  • Batteries and bulbs should never be disposed of in the regular garbage. Deliver them to designated disposal locations, such as recycling centers or home improvement stores.
  • Chemicals and paints: For information on the proper disposal of old paint cans, solvents, or other chemicals, please get in touch with your local waste disposal authority.

If necessary, rent a dumpster

Consider renting a small dumpster if you have a substantial quantity of trash or bulky items, such as furniture. Short-term rentals for a day or two are available from numerous waste disposal companies:

  • This alternative is advantageous when cleaning out a large unit and requiring the disposal of substantial quantities of garbage.
  • Please verify with your storage facility that dumpster placement is permitted on the premises.

Donate Items That Are Still Usable

Consider donating items that are in good condition and no longer desired but are not classified as trash:

  • Gently used furniture, clothing, and domestic items are accepted by numerous charities, thrift stores, and shelters.
  • Specific organizations provide complimentary pickup services, simplifying the process of donating more oversized items without stressing about transportation.

Visit the dumpster on numerous occasions.

If you are not renting a dumpster and your storage facility has on-site waste bins, it is essential to refrain from overloading them:

  • If necessary, make multiple journeys to the dumpster to prevent the bins from clogging or exceeding their weight capacity.
  • Respect the facility’s regulations regarding garbage disposal. In specific locations, there may be restrictions on the amount and type of waste that can be disposed of on the premises.

Get Rid of Bulky Items Conscientiously

For items that are too large to fit in standard waste cans, such as old furniture or appliances:

  • To schedule a bulk collection, contact your local waste management service. Numerous municipalities offer this service at no cost or for a nominal fee.
  • Conversely, trash removal services may be implemented. Companies such as 1-800-GOT-JUNK or local equivalents can remove large, undesirable items.

Prevent Illegal Dumping

Do not leave garbage outside the storage unit or dispose of it in unauthorized areas.

  • The storage facility and local authorities may impose fines or penalties for illegal disposal.
  • You must adhere to your facility’s garbage disposal policies and local regulations.
  • You can guarantee that your storage unit cleanout is conducted in an environmentally conscious and responsible manner by properly disposing of garbage and recycling or donating whenever feasible. Additionally, it ensures that you comply with the facility’s and municipal waste management regulations. 

Return the Unit to a State of Good Repair

Maintaining the unit in excellent repair is crucial after you have cleaned it, disposed of all the trash, and handled any remaining items. Doing so can circumvent fees and preserve a positive rapport with the storage facility. It is possible to restore the unit to a satisfactory condition by following these steps:

Inspect for any Signs of Damage

Thoroughly examine the unit to detect any indications of damage before your departure. Search for:

  • Holes or cracks in the ceiling, floor, or walls.
  • Dents or scratches that result from the movement of weighty objects.
  • Mold or water damage may have occurred over time.
  • Any damage to the security system, lock, or door (if applicable).

Please notify the facility staff immediately if you encounter any problems. Depending on the terms of your lease agreement, you may be accountable for repairing specific damage categories.

Repairing Minor Damage

If there are minor issues, such as small scratches or scuffs, take the necessary measures to resolve them:

  • Fill minor holes or cracks in the walls with a spackle.
  • Apply a gentle cleansing solution to any scuffs or marks that are readily apparent.
  • Sweep and clean the floor once more if necessary to guarantee that it is free of debris and in pristine condition.

Most storage facilities appreciate it when tenants perform minor repairs, demonstrating reverence for the property.

Guarantee that the unit is both Clean and Empty

Ensure that the unit is empty and that there are no lingering items or detritus. Storage facilities generally anticipate that you will return the unit in the same condition as when you arrived:

  • No trash, discarded items, or neglected belongings must be left behind.
  • It is imperative to eliminate all packaging materials, including protective wraps, bags, and boxes.

Please remove any locks on the unit before leaving unless the facility owns it.

Verify Lease Compliance

Please consult your lease agreement to confirm that you have fulfilled all the necessary conditions for the unit’s departure. The majority of agreements require that the unit be:

  • Spotless.
  • Undamaged more than typical wear and tear.
  • Entirely stripped of all personal possessions.

Please satisfy these prerequisites to avoid the forfeiture of a security deposit or the imposition of additional fees.

Notify the Facility Manager

Inform the storage facility manager or staff that the unit is clean and in excellent repair. The following is the appropriate course of action:

  • Notify them that you have completed the cleaning and emptying of the unit and are prepared to depart.
  • Please return any keys, keycards, or credentials to access the unit.
  • If necessary, request a final unit inspection to guarantee no issues.
  • If the facility has an online system, you must officially terminate your rental agreement to avoid being charged another month.
  • Take photographs for documentation.

Before departing, take a few photographs of the unit’s empty and spotless state. If any disputes arise regarding its condition, these prove that you have left it in excellent condition.

Remove your Lock

If you utilize your lock on the device, ensure it is removed. Leaving it behind could make them clear, as the facility may need to recognize the vacant unit, resulting in ongoing charges or misunderstandings.

  • Follow Up on Any Deposits or Fees
  • If you have submitted a security deposit, you must contact the facility to guarantee that you receive the complete amount, provided that no damages occurred. Additionally, certain facilities may have a final billing cycle or a refund procedure for prepaid rent. Therefore, it is crucial to verify these details before your departure.

Returning the unit in excellent repair guarantees a smooth and stress-free move-out process. This also contributes to preserving a favorable relationship with the storage facility, which will facilitate future rentals if necessary. 

Seek Assistance if Required

Cleaning out a self-storage unit can be physically and mentally taxing, particularly if you have a large unit or a high volume of weighty items. Please do not hesitate to seek help to ensure the process is more efficient, safer, and seamless. There are numerous methods for obtaining assistance:

Hire Professional Movers

If you have large, bulky, or weighty items like furniture, appliances, or boxes full of books, professional movers can be invaluable:

  • Movers are equipped with the necessary equipment, including furniture cushions and dollies, to ensure the safe transportation of your items.
  • They are trained to handle heavy lifting, which can help prevent injuries, particularly if you’re not used to moving large items.
  • Packing and unpacking services are also provided by certain moving companies, which can save you time.

Contact a Junk Removal Service

Consider hiring a junk removal service for items that are no longer usable or that you do not desire to retain:

  • Junk King, 1-800-GOT-JUNK, and local providers are among the organizations that will remove unwanted items, regardless of their size.
  • They frequently offer environmentally favorable disposal services to guarantee that recyclable items are appropriately managed.
  • Junk removal services are an excellent way to dispose of large quantities of garbage, appliances, or old furniture in a single operation.

Seek Assistance from Friends or Family Members

If you have a manageable amount of things but need an extra set of hands, ask friends or family for assistance:

  • Dividing the burden will expedite the process, and the additional assistance is especially beneficial when transporting heavier items.
  • Having a partner to discuss decisions can be beneficial, particularly when deciding whether to retain, sell, or donate specific objects.
  • You may offer them a modest incentive, such as food or beverages, in appreciation for their time and effort.

Hire Professional Organizers

A professional organizer may be a viable alternative if you are experiencing difficulty with decluttering or are overwhelmed by the process of sifting through your possessions:

  • Professional organizers specialize in optimizing checklist space, decluttering, and categorizing. They can assist you in developing a systematic approach to cleaning the unit.
  • They may offer valuable guidance on storage solutions and strategies for maintaining the organization of your remaining items.
  • If you’re unsure of what to retain, donate, or discard, they can offer an objective perspective to help make those decisions.

Utilize Donation Pickup or Delivery Services

Many charities and donation centers provide free pickup services for items you wish to donate but need more means to convey them.

  • Goodwill, the Salvation Army, and other local charities frequently offer pickup services for more significant donations, such as furniture, electronics, or apparel.
  • Schedule a pickup in advance so the items can be taken away after sorting without needing multiple trips.

Equipment Rental or Borrowing

Renting or borrowing equipment such as hand trucks, dollies, or furniture sliders can significantly simplify the process of moving if your storage unit contains weighty or large items:

  • Rental options for moving equipment are available from numerous storage facilities or moving supply companies.
  • If you want to avoid investing in purchasing tools, consult with friends or family to see if you can borrow equipment for the day.

Consult the Personnel of the Storage Facility

ASK the storage facility personnel for help if you are uncertain about any specific procedures for cleaning out your unit or disposing of trash:

  • They can offer advice on the location of trash disposal, the regulations of the facility, and the process of utilizing any moving equipment they may have available.
  • Staff can suggest reputable companies to assist with the process, as some facilities also collaborate with garbage removal or moving services.

Hiring a Cleaning Service is a Viable Option

A professional cleaning service can assist in guaranteeing that the unit is immaculate and adheres to the facility’s standards after it has been emptied:

  • This is particularly beneficial if the unit has accumulated grit, grime, or stains over time.
  • A cleaning service can sweep surfaces, mop down surfaces, and remove stubborn stains, sparing you time and effort.
  • You will reduce your burden by requesting assistance when necessary and guaranteeing that the storage unit is neat and tidy for work efficiency and safety. Numerous resources, such as professional movers, acquaintances, or specialized services, are at your disposal to help you complete the task without becoming overwhelmed. 

Conclusion

Cleaning out a storage unit can be a manageable endeavor. Employing intelligent organization, meticulous planning, and appropriate assistance can expedite decluttering and clearing the space. This process can provide a fresh start for your storage unit and your psyche, whether you are downsizing or simply organizing. 

Frequently Asked Questions

What is the necessity of organizing my storage unit?

Cleaning out your storage unit guarantees you maintain a positive relationship with the storage facility, avoids additional fees, and leaves the space in excellent condition. Additionally, it helps you more effectively manage and declutter your possessions.

What is the most crucial step when cleansing my storage unit?

Begin by strategizing and organizing. Evaluate the task’s scope, accumulate the required materials, and establish a schedule. Ensure you have all the requisite packing materials, cleaning supplies, and cartons.

What is the most effective method for organizing items in the storage unit for sorting?

Tips of organizing your self-storage unit is to arrange items into categories such as “keep,” “donate,” “sell,” and “trash.” Collect similar items and establish a systematic approach to each category. This will assist you in maintaining a more organized state and making decisions more efficiently.

What is the 80/20 Rule, and how does it relate to emptying a storage unit?

The 80/20 Rule, also known as the Pareto Principle, posits that 80% of your outcomes result from 20% of your efforts. Prioritize the 20% of items that are the most significant or valuable. Then, the same principle can be applied to the remaining 80% of items, making fast decisions to streamline the process.

What is the most effective method for labeling and packing boxes?

Indicate the contents of the boxes and the chamber to which they belong. Seal crates securely with tape, protect fragile items with padding, and use sturdy boxes. Utilize color-coded labels to facilitate identification.

Following emptying the storage unit, which cleansing tasks should I undertake?

Sweep the floors, wash down surfaces, and inspect for any indications of damage. If necessary, do minor repairs and guarantee the unit is devoid of debris and garbage. Ensure that the space is left spotless and unoccupied by the lease agreement.

What is the most effective method for disposing of unwanted items and trash?

Divide trash into hazardous materials, recyclables, and regular detritus. Dispose garbage in heavy-duty bags, recycle in designated bins, and adhere to local regulations when managing hazardous waste. For large or difficult-to-dispose-of items, it may be advantageous to engage the services of refuse removal professionals.

What if I require assistance with organizing my storage unit?

If the task is overwhelming, consider hiring professional movers, garbage removal services, or a cleaning service. Additionally, you may seek assistance from friends or family members or consult the storage facility personnel for information on available resources.

How can I guarantee the unit is returned in excellent repair?

Ensure the unit is spotless and empty, and make any necessary minor repairs. Additionally, inspect the unit for damage. Return any keys or locks the facility has provided per the lease agreement. If necessary, photograph the instrument to document its condition.

What actions should I take if I encounter vermin or other issues within the unit?

Inform the storage facility management as soon as possible of any indications of vermin or other problems. They may need to address the issue or offer advice on resolving it. 

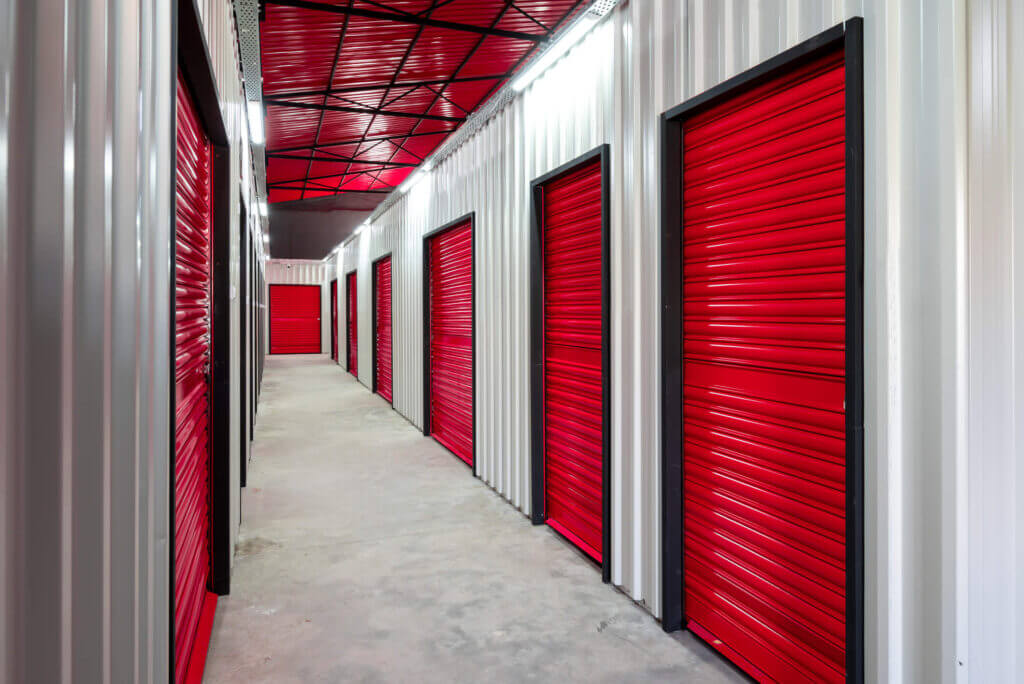
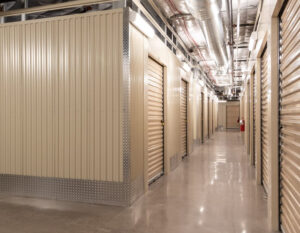
Streamline Your Storage Unit Cleanup with Professional Advice!

Prevent the accumulation of debris in your storage unit from escalating into disorder. Cleaning out your storage space can be seamless and effective when approached correctly. At McDowell Mountain Community Storage, we provide premium climate-controlled facilities that guarantee your possessions are stored in the most favorable conditions, simplifying and expediting the cleanup process. 

For additional information regarding the advantages of storage units, please refer to our previous blog posts: Climate-Controlled Storage Units: What You Need to Know and The Pros and Cons of Renting a Storage Unit. McDowell Mountain Community Storage in Scottsdale, Arizona, offers cutting-edge storage solutions in a clean, controlled environment with state-of-the-art security features. Contact us today to discover how our climate-controlled units can facilitate your storage unit cleanup and ensure the safety of your valuables. 

How to Store Furniture in a Storage Unit?

Properly storing furniture in a storage unit is essential to maintaining its condition and preventing damage from moisture, dust, mold, and other environmental factors. Whether you are relocating, downsizing, or needing extra space, following these storage unit tips will help arrange your inventory in an organized way, keeping it safe from dirt and ensuring easy access to your belongings. With various locations available, choosing the right one is crucial to protecting your things because when it comes to storage, not just anything will do. 

McDowell Mountain Community Storage provides a secure and well-maintained self-storage facility with various storage unit size guide options to meet your needs. Whether you need to move a single item or store multiple materials, we offer solutions for every type of furniture. This guide will walk you through the best ways to prepare, pack, and label your belongings, ensuring they remain in excellent condition throughout their storage. We aim to help customers protect their valuables while maximizing their storage areas for better accessibility and organization. 

Why Proper Furniture Storage Matters

Storing furniture improperly can lead to various issues, including:

  • Mold Growth and Mildew: Caused by high humidity levels, which can ruin fabric, wood, and leather.
  • Pests and Infestations: Rodents and insects can nest in sofas, mattresses, and wood furniture.
  • Scratches and Dents: Poor stacking and lack of proper padding can result in surface damage.
  • Structural Warping: Excessive exposure to extreme temperatures and humidity can alter the shape of wooden pieces.

By taking preventive steps, you can organize your furniture correctly and ensure that it remains in excellent condition while in storage, protecting it from environmental factors and preserving its material quality. 

Step 1: Choosing the Right Storage Unit

Selecting an appropriate storage unit is the first step to keeping your items safe. Consider the following factors:

1. Climate Controlled vs. Standard Storage

A climate-controlled storage unit is highly recommended, especially for valuable furniture pieces. It helps maintain stable humidity levels and protects against temperature fluctuations that can lead to mildew, stains, and warping. This option is ideal for businesses and individuals seeking a secure self-storage solution. Choosing the right location is crucial to minimizing exposure to debris and environmental damage. Extra precautions can go a long way in preserving your furniture, ensuring it stays in top condition while respecting your rights as a storage user.

However, if you choose a standard storage unit, ensure proper ventilation, air circulation, and additional protection like plastic or cardboard coverings. Protective materials like furniture blankets can help prevent scratches and dust buildup. Wrapping delicate items like mirrors and glass furniture securely in a padded box will add extra protection and maintain their value over time. 

2. Storage Unit Size Guide

Understanding the right storage unit size guide is essential for efficient organization. A well-planned self storage unit protects items from heat and ensures easy access through the door. Many facilities offer an app to track fees, making storage in your town more convenient. The main reason for choosing the right unit is to keep your belongings safe and organized. Here’s a breakdown of shared storage unit sizes:

  • 5×5 Unit – Suitable for small boxes, a few chairs, or a dresser.
  • 5×10 Unit – Ideal for a small apartment’s worth of furniture, such as a sofa, table, and mattress.
  • 10×10 Unit – Fits several pieces like a couch, bed frames, and bookshelves.
  • 10×20 Unit – Best for home furniture, including sofas, tables, chairs, and storage supplies.

Consider the space needed for walkways to ensure easy access to your belongings.

Step 2: Preparing Furniture for Storage

Proper preparation is key to preventing damage and maintaining the lifespan of your furniture item. Different types of materials require specific care to preserve their appearance. With the right approach, you can ensure a better storage experience and keep your belongings in excellent condition. These steps will help protect your furniture for the long term.

1. Clean Everything Thoroughly

Before moving your items into a storage unit, clean all surfaces using:

  • Soap and Water – Ideal for wood and hard materials.
  • Upholstery Cleaner – For fabric and leather furniture.
  • Leather Conditioner – Helps protect sofas, chairs, and couches from drying out.

Allow everything to dry completely to prevent mold growth and mildew.

2. Disassemble Large Furniture Pieces

Taking apart larger items will help maximize storage space and minimize the risk of scratches or dents.

  • Remove table legs, bed frames, and bookshelves.
  • Store screws, bolts, and nuts in a labeled bag.
  • Keep all hardware with the corresponding furniture piece.

3. Protect Your Furniture with the Right Materials

Use blankets, bubble wrap, and plastic covers to protect furniture surfaces. Additional packing supplies include:

  • Cardboard Sheets – Helps prevent scratches and stains.
  • Padding and Tape – Secures fragile edges and corners.
  • Sheets and Cloth – Keeps dust from accumulating on sofas and tables.

Step 3: Organizing Furniture in a Storage Unit

Once your items are packed, arranging them correctly inside the unit is crucial.

1. Place Heavier Items at the Back

Position bulky pieces like sofas, dressers, and mattresses at the Back of the unit to create a stable base.

2. Stack Smartly

  • Use pallets or cinder blocks to elevate furniture off the floor.
  • Place lighter items on top of heavier ones.
  • Avoid overstacking to prevent damage to fragile materials.

3. Leave a Walkway for Easy Access

An open walkway will make accessing stored items easier without unnecessary transportation or rearranging. Using furniture covers can help protect pieces while maximizing room efficiency. Properly planning storage also ensures better organization and can even reduce rental rates in the long run. 

4. Maintain Air Circulation

Proper air circulation prevents humidity buildup, reducing the risk of mold growth and moisture damage. One of the main reasons to allow airflow is to protect valuable possessions in your self-storage unit. Avoid pushing furniture directly against walls for better ventilation, ensuring both men’s and women’s customers keep their items in top condition. 

Step 4: Long-Term Storage Care


McDowell Mountain Community Storage in Scottsdale Arizona offers expert tips on how to store furniture in a storage unit to prevent damage and maximize space
Store furniture properly at McDowell Mountain Community Storage in Scottsdale Arizona with climate-controlled units and expert packing techniques

Trust McDowell Mountain Community Storage for secure and reliable storage solutions to keep your furniture in good condition over time. Our facility offers the ideal environment to protect your belongings from moisture, dust, and damage. Follow these additional steps:

1. Check Your Storage Unit Regularly

Make it a habit to inspect your unit for pests, mold, and any damage. If you notice humidity issues, use a dehumidifier to maintain stable temperatures. Checking for spills and ensuring items are not pressed against the wall can help prevent moisture buildup. Regular inspections provide long-term benefits by keeping your belongings in the best condition.

2. Cover Items with Fabric, Not Plastic

While plastic covers can protect against water, they can trap moisture, leading to mildew. Instead, use cloth, sheets, or breathable covers.

3. Protect Against Pests

Rodents and insects can be a significant risk in storage facilities. Use:

  • Pest-Repellent Bags – Store clothing, fabric, and mattresses safely.
  • Sealed Plastic Containers – Prevent insects from accessing storage supplies.

Final Thoughts on Storing Furniture in a Storage Unit

Proper furniture storage requires careful planning, from choosing the right storage unit size guide to using the correct materials for protection. Following these storage unit tips ensures your belongings remain in excellent condition while in self-storage.

Looking for a reliable storage facility? McDowell Mountain Community Storage offers secure storage units with climate control and various options to fit your needs. Whether you’re storing sofas, tables, or an entire home’s worth of furniture, our facilities provide the best conditions for long-term storage.

For more information, visit our sitemap, check out our menu of services, or contact us for a personalized storage solution!

Frequently Asked Questions

1. How long can furniture be stored in a storage unit?

Furniture can be stored in a storage unit for as long as needed, provided it is adequately prepared and protected. Climate-controlled units are best for long-term storage to prevent humidity-related damage like mold or warping. Regularly checking your items and maintaining good air circulation can help preserve their condition.

2. What are the best storage solutions for antique or delicate furniture?

Antique and delicate furniture should be stored in a climate-controlled storage unit to prevent temperature fluctuations and humidity damage. Furniture blankets, bubble wrap, and cloth covers should protect surfaces. Fragile items like mirrors or glass doors should be wrapped in padding and stored upright to prevent breakage.

3. Can I store outdoor furniture in a storage unit?

Yes, outdoor furniture can be stored, but it must be cleaned and dried first to prevent mold and rust. Plastic covers can help protect against dust, while breathable fabric covers prevent moisture buildup. Elevating items off the floor with pallets or cinder blocks can protect them from water or dirt.

4. Are there any restrictions on what type of furniture can be stored?

Most standard furniture can be stored in a unit, but flammable, hazardous, or perishable items are prohibited. This includes furniture treated with chemicals that could release harmful fumes. Check with McDowell Mountain Community Storage for any restrictions before storing your furniture.

5. How do I prevent my furniture from smelling musty in storage?

Ensure the furniture is completely dry before storing it to prevent musty odors. Use charcoal bags or moisture absorbers to help control humidity. Keeping furniture slightly elevated and leaving a small gap between items can improve air circulation and reduce odor buildup.

6. Should I use a professional moving service to transport my furniture to storage?

If you have large or heavy furniture, hiring a professional moving service can help prevent damage during transportation. Movers can properly disassemble, wrap, and secure furniture, reducing the risk of scratches, dents, or breakage. If moving items yourself, use moving blankets, straps, and a dolly for safety.

7. How do I store furniture with glass components safely?

Glass tabletops, doors, and mirrors should be wrapped in bubble wrap and secured in a box or padded cover. To prevent breakage, always store glass items vertically, never flat. Label them as fragile and place them in a low-traffic area of your storage unit.

8. Is insurance necessary for stored furniture?

While not required, storage insurance is highly recommended, especially for valuable or antique furniture. Many storage facilities offer insurance plans, or you can check if your homeowners’ or renters’ insurance covers storage units.

9. How do I keep rodents and insects away from my furniture in storage?

To prevent pests, store furniture in a clean, dry storage unit. Use sealed plastic containers for small items, and avoid storing food or scented products. Placing pest-repellent bags or traps inside the unit can help keep insects and rodents away.

10. What should I do if I need to retrieve an item from storage quickly?

Label all boxes and furniture pieces clearly and keep an inventory list to make retrieval easy. Arrange furniture so that there is a walkway for easy access. Place frequently used items near the front of the unit so you can grab them without moving everything around.

How to Use Self-Storage for Home Renovation Projects?

A home renovation project can transform your living space, adding value, comfort, and functionality. However, the process comes with challenges, including dealing with clutter, protecting furniture, and keeping household items safe from dust, debris, and potential damage. Whether renovating a single room or the entire house, self-storage provides an efficient solution to declutter your space while ensuring convenience, flexibility, and secure transport of your belongings. With the proper logistics, self-storage helps manage furniture and construction materials while maintaining an organized environment.

At McDowell Mountain Community Storage, we understand the importance of securing your valuables during a renovation. With self-storage, you can free up rooms and areas, keep your belongings safe and organized. This guide will cover why self-storage is essential, how to choose the right storage unit, the advantage of using a box for packing, and organization tips to help manage a lot of items efficiently. Plus, we’ll explore storage solutions for different home renovation projects. 

Why Use a Storage Unit for Home Renovation?

During a home renovation, your space becomes a construction zone filled with contractors, materials, tools, and debris. Storing your belongings in a self-storage unit is a brilliant idea to protect them from dust and damage. Storage has many benefits, such as keeping things organized and ensuring that important paper documents and fragile items remain safe. With the right approach, you can store anything securely while your renovation is underway. Having a secure storage unit to hold furniture, electronics, and personal belongings can simplify the process in many ways:

1. Protection Against Dust, Debris, and Damage

Home renovations generate dust and debris, which can settle on furniture, electronics, and artwork, leading to long-term damage. Using a self-storage unit ensures that your belongings remain in top condition, preventing scratches, dents, or exposure to humidity and temperature fluctuations. With the right options for packing, you can ensure nothing is left to chance. It’s a simple task that aligns with your contract and timeline, providing a safe pathway to store your items securely while the renovation progresses. Be sure to pack your belongings carefully to protect them during the process. 

2. Extra Space for a More Efficient Workflow

Renovations often require open space for contractors, flooring installations, and cabinet replacements. Moving large furniture pieces like tables, appliances, and cabinets to a storage facility can free up valuable room for workers, ensuring a smooth process without unnecessary obstructions. Storing these items with the right plan in place can make the renovation feel like a breeze. If you have any questions about managing your items or the life of your renovation project, our team is here to assist you every step of the way.

3. Better Organization and Accessibility

Storing household items and construction materials in a rental facility allows for a structured approach to renovation. Instead of shifting furniture and boxes from one room to another, a well-organized storage unit keeps everything secure and accessible when needed.

4. Enhanced Safety for Homeowners and Workers

Leaving furniture, decor, and appliances in the middle of a renovation site increases the risk of damage and accidents. Self storage units keep fragile glassware, antiques, electronics, and tools out of harm’s way, reducing the likelihood of injuries for homeowners and contractors.

5. Peace of Mind During the Renovation Process

A clutter-free environment leads to a less stressful experience. Knowing that your valuable furniture, household items, and decor are protected in a secure storage facility allows you to focus on the renovation without constant worry.

What to Store During a Home Renovation?

Every home renovation project has different storage needs, but certain items should be kept away from the construction area to ensure their safety and condition.

1. Furniture & Home Decor

Items such as sofas, chairs, dining tables, artwork, and antiques should be stored to prevent scratches, dust accumulation, and potential damage. Bubble wrap, blankets, and secure packing methods help maintain their original condition.

2. Electronics & Appliances

Temperature-sensitive electronics like televisions, computers, and kitchen appliances need a climate-controlled storage unit to avoid damage from humidity and temperature changes. A storage facility with controlled conditions ensures your valuable gadgets remain functional.

3. Construction Materials & Tools

During renovations, construction materials like flooring, paint, cabinets, and supplies should be stored in a secure storage unit to keep them from getting lost or damaged. Proper storage solutions, such as shelving and labeled containers, can help organize these materials efficiently.

4. Household & Personal Belongings

Items such as clothing, books, essential documents, and seasonal decorations should be packed securely in boxes and stored away from the construction zone. This prevents them from getting lost in the renovation process.

5. Fragile Items: Glassware, Antiques & Artwork

Delicate items like glassware, antiques, and artwork require special handling during renovations. Bubble wrap, temperature-controlled units, and sturdy containers best protect these fragile possessions.

How to Use Self-Storage for Home Renovation Projects Scottsdale

Choosing the Right Storage Unit for Your Home Renovation

The proper storage unit size, location, and amenities are essential to meet your renovation needs. Here are some factors to consider when choosing a storage facility:

1. Storage Size Guide: How Much Space Do You Need?

The proper storage unit size, as outlined in the storage unit size guide, depends on the furniture, belongings, and renovation materials you need to store.

  • 5×5 Unit – Ideal for storing small furniture, boxes, and decor items.
  • 5×10 Unit – Can accommodate appliances, chairs, or bedroom furniture.
  • 10×10 Unit – Perfect for storing items from a one-bedroom apartment.
  • 10×20 Unit – Best for storing multiple rooms’ belongings and furniture.

2. Climate-Controlled Storage Unit for Sensitive Items

A climate-controlled storage unit is recommended to store electronics, antiques, artwork, or essential documents. These units maintain stable temperature and humidity levels, ensuring the long-term protection of delicate contents.

3. Secure Storage Facilities & Convenient Location

Look for a storage facility with security features like surveillance cameras, gated access, and on-site management. A convenient location close to your home ensures easy access to your stored items throughout the renovation process.

4. Rental Facility Cost & Efficiency Considerations

The cost of a storage unit depends on unit sizes, amenities, and rental duration. Planning and choosing the right size unit can maximize efficiency and reduce costs.

Packing & Organization Tips for Self-Storage

Efficient packing, labeling, and organization can make self-storage easier and more effective. Here are some valuable tips:

1. Use High-Quality Packing Supplies

  • Choose sturdy boxes for storing small items.
  • Wrap furniture and decor in bubble wrap or blankets to prevent scratches.
  • Use plastic containers for moisture-sensitive materials.

2. Label and Track Everything

  • Keep an inventory list of all stored items.
  • Label boxes with detailed descriptions to quickly locate contents.
  • Arrange items by category for quick access.

3. Optimize Storage Space & Accessibility

  • Stack boxes strategically, placing heavier boxes at the bottom.
  • Store frequently used items at the front of the unit.
  • Use shelving units for easy organization.

Storage Solutions for Different Renovation Scenarios

Depending on the type of home renovation project, your storage needs will vary.

1. Kitchen Renovation

A kitchen remodel requires storing appliances, cabinets, furniture, and cookware. Consider a self storage unit for these items until the project is complete.

2. Living Room or Bedroom Remodel

Store furniture, electronics, decor, and personal belongings in a climate-controlled storage unit to protect them from dust and damage.

3. Garage Renovation & Inventory Management

A garage renovation often involves clearing tools, storage bins, and furniture. A self-storage unit provides a temporary place to keep Everything secure.

4. Whole-House Renovation

A large-scale home renovation may require a variety of storage solutions. Choosing the proper storage unit size and using organizational strategies can help streamline the renovation process.

Final Thoughts

A well-planned self-storage solution can make your home renovation experience stress-free. From protecting belongings and furniture to creating extra space for contractors, using a storage unit is one of the best ways to simplify renovation.

Looking for a secure, convenient, and flexible self-storage unit? McDowell Mountain Community Storage offers storage solutions tailored to your needs, ensuring your belongings remain safe and accessible throughout your renovation.

Contact us today for the perfect self-storage unit for your next home renovation project!

Frequently Asked Questions

Explore our FAQs to learn how self-storage can simplify your renovation, from protecting valuables to choosing the right unit. 

How Long Can I Keep My Belongings in a Self-Storage Unit? 

You can rent a self-storage unit for as long as needed, whether for a few weeks or months, depending on the duration of your renovation. Most facilities offer flexible rental agreements, allowing you to extend storage as your renovation timeline evolves.

Can I Store Appliances in a Self-Storage Unit During a Renovation? 

Storing large appliances such as refrigerators, washing machines, or dishwashers is possible. Prepare them by cleaning them and draining any water properly. For protection, wrap appliances in moving blankets to prevent scratches and dents.

What Should I Do if I Need to Change My Storage Unit Size During Renovation? 

If your storage needs change during your renovation, you can switch to a larger or smaller unit based on availability. It is best to discuss your options with the facility in advance to ensure a unit fits your new requirements.

Is it possible to access my stored items outside of regular business hours? 

Many self-storage facilities offer 24-hour access for an additional fee, allowing you to retrieve or store items whenever needed. Check with the storage facility for their access hours and inquire about any special arrangements they may offer for extended access.

How Do I Ensure My Items Are Covered by Insurance While in Storage? 

It’s essential to check with the storage facility to see if they offer insurance for stored items. Some facilities provide insurance coverage as part of your rental agreement, while others may require you to arrange third-party insurance for high-value items.

Are there Any Restrictions on What Can Be Stored in a Self-Storage Unit During a Renovation? 

Most self-storage units restrict the storage of hazardous materials, perishable goods, or illegal items. Be sure to check with your facility about its specific rules and guidelines, especially when storing chemicals, paint, or flammable materials.

How Can I Store My Valuables Like Jewelry or Important Documents? 

Consider using a secure and climate-controlled storage unit for high-value items like jewelry or important documents. You may also opt for a safe deposit box or an additional insurance plan to protect them while in storage.

What Is the Cost of Renting a Self-Storage Unit for Home Renovation? 

The cost of renting a self-storage unit can vary depending on its size, location, and additional features like climate control. It’s a good idea to compare pricing from different facilities and select one that fits your budget while providing the necessary features for your renovation.

Can I Use Self-Storage for Temporary Housing During a Home Renovation? 

While self-storage units are designed for storing belongings, some people use them for temporary housing purposes, especially if renovations make living in the home impractical. However, it’s essential to check with your storage facility to ensure they allow this and that it’s appropriate for your needs.

What Are Some Tips for Storing Large or Bulky Items During a Renovation? 

Plan your packing carefully for large or bulky items like furniture to maximize space. Use disassembly options (e.g., removing legs from tables), and wrap items with bubble wrap or protective blankets. Position heavy items at the bottom and lighter ones on top for stability during storage.

Why Self-Storage Can Make Your Transition Easier

The need for extra space often arises in the whirlwind of life transitions, whether moving to a new city, downsizing your house, or renovating your home. Amidst the chaos of packing, organizing, and decluttering, self-storage is a beacon of convenience and practicality. Whether you’re storing appliances, nursery furniture, toys, or valuable items, self storage units provide a safe place for your things. It can feel daunting in times of change, like a divorce or when preparing your home for potential buyers. The pressure to manage everything can be overwhelming, but with a thoughtful approach, you can avoid damage to your belongings and keep them in a secure place. Self-storage offers families a practical solution to navigate transitions with ease and peace of mind.

Benefits of Self-Storage During Transitions

Life transitions—whether they involve relocation, reduction, or the management of substantial changes—can be both thrilling and taxing. During these periods, the process can be significantly simplified by having a dependable location to store your possessions. Numerous benefits of self storage can assist in organizing your possessions, reduce tension, and help simplify your transition. During transitions, self-storage offers several significant benefits.

Declutter Before the Move

Moving to a new location can be a daunting experience, particularly if you bring all your possessions. Before relocating, self-storage enables you to organize your existing space. You can gradually begin to pack non-essential items into storage and establish a more defined timeline for the tasks that must be completed in the days preceding your transfer. This alleviates the tension associated with managing an excessive number of tasks simultaneously.

Timing Flexibility

Timing is one of the primary obstacles associated with relocation. Your new residence may not be ready yet, or the dates may not perfectly align with your move-out schedule. Self-storage offers a versatile solution by enabling you to secure your possessions until you are prepared to relocate them to your new residence. This alleviates the stress of having to complete everything simultaneously.

Storage of Extra Furniture or Seasonal Items

Only some of your possessions must be relocated immediately or even to your new location. Self-storage provides a secure location for storing seasonal objects, such as holiday decorations, out-of-season clothing, or extra furniture. While settling in, you can store these items out of the way and only retrieve them when required, which will assist in maintaining the organization of your new space.

A Temporary Residence for Your Personal Effects

Self-storage is an excellent solution for those transitioning between residences or downsizing, as it allows them to temporarily store their belongings without making permanent decisions about what to keep or discard. Once you have established yourself in your new location, you can determine what to do with specific objects. You may discover that certain items no longer correspond with your lifestyle, or you may wish to donate or sell items you intend to retain.

Assists in the Development of Organizational Plans

Organization is frequently a component of transitioning from one residence or stage of life to another. Self-storage can serve as an extension of your organizational endeavors. It allows you to organize your possessions and ascertain their appropriate disposition. Self-storage is a valuable resource for maintaining order during a transition, whether selling unused items, conducting an inventory of your possessions, or simply requiring a temporary location to sift through boxes.

Confidence and Safety

Security is one of the primary advantages of self-storage. When your possessions are stored in a professional facility, you can be assured that they are secure and safeguarded. Whether you are storing sensitive items or need a secure location for extra furniture, modern self-storage units are equipped with 24/7 surveillance, gated access, and climate control to ensure your belongings are stored optimally.

Convenient and Cost-Effective

Self-storage is frequently a more cost-effective alternative to renting additional living space during a transition. Its affordable monthly rates and convenient access to belongings make it seamlessly integrated into your budget and schedule. Additionally, numerous self-storage facilities provide diverse unit sizes, ensuring you only pay for the required space.

Mitigating Stress and Overwhelm

Life transitions, whether relocation, downsizing or simply adapting to a new lifestyle, are frequently distressing. Self-storage provides a buffer between the frantic tempo of moving and the tranquility of settling in. Having a designated storage area alleviates some stress, enabling you to concentrate on critical duties and ensure that your possessions are secure and prepared for their arrival.

Why Self-Storage Can Make Your Transition Easier In Scottsdale, Arizona

Types of Self-Storage Units Available

Comprehending the various units available when contemplating self-storage is crucial, as each type is intended to meet distinct requirements. There is a storage solution that can accommodate your needs, regardless of whether you are storing domestic items, business inventory, or sensitive belongings. The following is a comprehensive list of the most frequently encountered varieties of self-storage units to assist you in determining the most suitable option for your needs.

Conventional/Traditional Storage Units

These are the most prevalent forms of self-storage units. They are typically enclosed indoor spaces that can store various items, such as furniture, boxes, and general household products. These units are available in various sizes, ranging from small 5×5 units to enormous 10×30 units or even more significant.

  • Ideal for: Furniture, household items, seasonal storage, and general possessions.
  • Features: Secure locks, 24/7 surveillance, and drive-up access.

Storage Units with Climate Control

Climate-controlled storage facilities are intended to safeguard delicate items by maintaining a consistent temperature and humidity level. These containers are optimal for electronics, artwork, antiques, wine, and critical documents susceptible to moisture or extreme temperatures.

  • Optimal for: Wine, documents, collectibles, artwork, and electronic devices susceptible to temperature fluctuations.
  • Characteristics: Temperature and humidity regulation, frequently conducted indoors or in a temperature-monitored structure.

Storage Units with Drive-Up Doors

Drive-up units are outdoor storage spaces that allow you to drive directly up to the unit’s entrance to load and unload your belongings. These units are convenient for individuals with weighty or large items to store and wish to reduce the effort required to transport them over long distances.

  • Ideal for: Items that require frequent access, heavy equipment, vehicles, or large furniture.
  • Features: Frequently lacking in climate control; lacks hallways and elevators for effortless accessibility.

Storage Units for Indoor Use

Indoor storage units are frequently situated on multiple floors within a building. They offer more excellent shelter from the elements than outdoor drive-up units; however, they ordinarily require elevators and hallways for access. They are typically more secure and may include climate control.

  • Optimal for: Items that necessitate additional weather protection, personal possessions, and documents.
  • Features: Drive-up units are more convenient for loading and offloading but offer more security and frequent climate control options.

Storage Units for Outdoor Use

Outdoor storage units are open-air and accessible from the exterior. They are typically employed for larger items that do not necessitate climate regulation. These units are frequently employed for storing extensive equipment, tools, and vehicles such as watercraft, RVs, and trailers.

  • Optimal for: Trailers, RVs, boats, vehicles, and substantial apparatus.
  • Features: Lacks climate control; accessible from the exterior.

Storage Units for Vehicles

Vehicle storage units accommodate cars, trucks, motorcycles, yachts, and recreational vehicles. Some units are interior, while others are outdoor spaces with covered or uncovered parking. Climate-controlled storage is an option for sensitive vehicles, such as classic automobiles.

  • Optimal for: Motorcycles, watercraft, RVs, cars, and other vehicles.
  • Features: Indoor storage options with security features, occasionally climate control, and covered or uncovered storage.

Storage Units for Business

Business storage facilities are intended to accommodate business requirements, including inventory, equipment, and documents. These units are frequently more significant and may include amenities tailored to business proprietors’ needs, such as office space options, 24-hour access, and higher ceilings.

  • Optimal for: Office supplies, equipment, business documents, and inventory.
  • Features: Larger units frequently offer extended access hours and supplementary services such as cargo docks or shelving.

Mobile Storage Units (Portable Storage Units)

Portable storage units, also known as “pods,” are delivered to your location, and you can load them at your leisure. The storage company collects the unit and transports it to a storage facility or stores it on your property for an extended period. These are particularly well-suited for individuals who are in the process of moving or who require transient storage.

  • Ideal for: renovations, short-term storage, and moving.
  • Features: Mobile, convenient for packaging at your own pace, delivered to your location.

Storage Units for Students

During the summer months, when students require storage of their possessions between school terms, certain self-storage facilities provide units specifically designed for students. These units are generally smaller and offer flexible rental terms to accommodate students’ schedules.

  • Ideal for: college students who require storage for seasonal items, dorm room belongings, or summer vacation storage.
  • Features: Frequently situated near campuses, these units are smaller and have more flexible rental periods.

Wine Storage Units

Wine storage units are specialized facilities specifically designed to maintain the optimal conditions for wine storage, including regulating humidity, temperature, and ventilation. These units are typically climate-controlled and are designed for wine collectors or businesses that require long-term storage for their wine inventory.

  • Optimal for: Commercial wine storage and wine collections.
  • Features: Secure, humidity-regulated, and climate-controlled. 

Final thoughts

Self-storage is not exclusively for individuals who require long-term storage solutions; it is an invaluable asset during life transitions. Whether moving, decluttering, downsizing, or needing additional space, self-storage helps fill the gap and provides a practical solution. It offers security, peace of mind, and flexibility, all essential for facilitating your transition. Self-storage allows you to safeguard the value of your belongings, from a loved one’s treasured items to a child’s toys and gives you the time to focus on other tasks. Experience the convenience of self-storage by incorporating it into your moving plan, ensuring your home and family member’s things are safely stored and easily accessible.

Frequently Asked Questions

What factors should I consider when selecting a self-storage facility for my transition?

Search for a self-storage facility that provides security features (such as surveillance and gated access), convenience (such as 24/7 access or location), and options for climate control or specialized storage if necessary. Furthermore, evaluate whether the facility provides packing supplies, moving vehicles, or other services that may facilitate your transition.

Is it necessary for me to execute a long-term contract for self-storage?

No, most self-storage facilities provide flexible month-to-month rental agreements, eliminating the necessity of signing a long-term contract. This is especially beneficial during transition periods, when it may be uncertain how long the storage will be required.

How can I determine the appropriate quantity of a self-storage unit for my transition?

When selecting a self-storage unit, consider the quantity and variety of items that require storage. Larger units (10×15, 10×20, or larger) are appropriate for larger items, such as entire residences or furniture, while smaller units (5×5 or 5×10) are optimal for boxes and miniature furniture. Numerous self-storage facilities offer size guides and staff support to assist you in selecting the most suitable unit.

Is self-storage a cost-effective option during a transition?

Self-storage is frequently a cost-effective solution compared to alternatives such as renting additional space or employing a moving company to store your items. Month-to-month pricing facilitates the flexibility and cost-effectiveness of self-storage by allowing you to pay only for the storage you require.

Are self-storage facilities secure?

Indeed, most self-storage facilities provide high levels of security, such as gated access, surveillance cameras, and on-site management. Additionally, certain facilities provide secure locks and individual unit alarms to guarantee the safety of your possessions during your transition.

In what ways can self-storage be beneficial for individuals who are transitioning between different living arrangements?

Self-storage provides a versatile solution for individuals either transitioning between residences or anticipating the completion of their new residence. You can prevent the inconvenience and expenses of frequently relocating your possessions from one location to another by storing them in a secure unit until you have fully settled into your new home.

Can self-storage assist in organizing a life transition, such as retirement or a significant life change?

Yes! Whether you are transitioning into a new phase of life, moving in with family, or downsizing due to retirement, self-storage can provide the necessary space to store items that no longer reflect your new lifestyle. It allows you to organize your possessions without feeling compelled to act in a hurry.

Can self-storage simplify the process of staging my home for sale?

Self-storage has the potential to enhance the appeal of your home by providing a location to store personal items and furniture that may otherwise clutter it, thereby attracting potential purchasers. By temporarily removing non-essential items, you can create a cleaner, more spacious ambiance and highlight your home’s best features.

Is there a restriction on the number of items stored in a self-storage unit?

Most self-storage facilities have limitations on the types of items that can be stored. Hazardous materials, flammable items, or perishable commodities are generally prohibited. Nevertheless, storing a wide range of items, including electronics, apparel, furniture, and boxes, is feasible. It is advisable to consult with the facility in advance to guarantee that your items adhere to their storage policies.

What is the most effective method for packing my belongings for self-storage during a transition?

Proper packaging is essential for safeguarding your possessions during storage. Sturdy cartons, packing peanuts, and bubble wrap should be employed to package fragile items for most items. If you are storing furniture, it is advisable to disassemble large parts and wrap them in protective materials. Additionally, ensure that your containers are plainly labeled to facilitate subsequent retrieval. Please consult the facility for advice on the secure storage of any specialty items you may possess. 

Rent a Storage Unit at McDowell Mountain Community Storage today!

At McDowell Mountain Community Storage, we prioritize your belongings’ safety, security, and efficiency in our self-storage units. Whether you’re facing life changes, decluttering, or specific storage needs, our logistics are designed to provide secure and reliable self-storage solutions. With top-notch security measures, we ensure that your valuables, family heirlooms, and personal items are well protected. Renting a unit with us can help you overcome the challenges of managing space during transitional situations.

Contact us today to learn how renting self-storage units can make your transition easier. Let us be your trusted ally in simplifying, organizing, and securely storing your belongings during times of change with helpful tips and the perfect storage space for your needs!

How to Store Appliances in a Storage Unit

When it comes to storing appliances in a storage unit, the key is not just tossing them in and hoping for the best. Proper storage ensures that your appliances remain in good condition and ready for future use. Whether you’re moving, downsizing, or simply decluttering, here’s a comprehensive guide on how to store appliances in a storage unit safely and efficiently.

1. Clean and Prepare

Cleaning and preparing appliances before storing them is crucial for keeping them in good shape. First, get rid of any food bits, dust, or grime. For refrigerators and freezers, defrost them thoroughly to stop mold and mildew. Drying everything well is essential to avoid rust or rancid smells.

Use a gentle cleaner to wipe everything down, then let it air dry completely before packing it up. Doing this keeps your appliances clean and safe while in self-storage, ensuring they work great when you need them again.

2. Gather Supplies

Before packing your appliances for storage, ensure you have all the necessary supplies. Get sturdy boxes, packing tape, bubble wrap, packing peanuts, furniture blankets, and appliance covers to safeguard your items during transportation and appliance storage.

Appliance-specific moving straps or dollies can be helpful, particularly for heavier kitchen appliances, ensuring safe and secure transport. The right supplies streamline the packing process and offer additional protection to your appliances, keeping them in excellent condition while stored.

3. Disassemble if Possible

Taking apart your appliances before storing them is a good idea, especially if they come with parts or shelves that can be removed. This saves space in your self-storage unit and lowers the chances of damage when moving and while in storage. Keep all the small pieces together in a labeled bag or box to find them easily when you need them again.

By disassembling your appliances before storing them, you can make the process smoother, protect fragile parts, and better use the available space.

4. Protect with Packaging

Once you’ve cleaned and, if necessary, disassembled your appliances, it’s important to protect them with the right packaging materials. Wrap fragile parts like glass doors or shelves with bubble wrap to cushion against bumps. Use furniture blankets to shield surfaces from scratches and dents while in transit or storage.

Secure everything firmly with packing tape to keep it in place and reduce the risk of damage. Following these steps is vital to keep your appliances in good condition until you need them again.

5. Utilize Vertical Space

To store your appliances efficiently in a self-storage unit:

  • Think smart about how you place them.
  • Stack lighter things on top of heavier ones to save space and keep everything stable.
  • Put big appliances, like the refrigerator and washing machine, at the back for a solid base.

This leaves space in the front for smaller stuff like microwaves and toasters, making them easy to get to without rearranging everything. With this setup, you’ll have a neat storage space that uses every inch well and keeps your appliances handy whenever needed.

6. Allow for Ventilation

Ensuring proper ventilation is crucial in safeguarding your appliances during storage. Without adequate airflow, moisture buildup can occur, resulting in rust, corrosion, and unpleasant odors. To mitigate these risks, leaving sufficient space between appliances and the walls is essential to promote air circulation within the storage unit.

Additionally, incorporating moisture-absorbing products such as silica gel packets or dehumidifiers can provide an extra layer of protection against moisture-related damage. By prioritizing ventilation and moisture control, you can maintain the integrity of your appliances and preserve their condition for future use.

7. Label and Organize

Organization is vital when it comes to storing appliances in a self-storage unit. By labeling each box or appliance with its contents and where it belongs, you streamline the process of finding what you need without rummaging through stacks of boxes.

Creating a straightforward inventory list also helps you keep track of everything stored in your unit, adding an extra layer of convenience. With these organizational strategies in place, you can efficiently manage your storage space and easily access your appliances whenever necessary.

8. Check Regularly

Regularly monitoring your stored appliances is crucial to maintaining their condition over time. Take the time to inspect them periodically for any signs of moisture buildup, pests, or damage. Addressing these issues promptly can prevent them from escalating and causing further harm to your appliances.

Additionally, consider rotating the position of items if needed to distribute weight evenly and avoid putting prolonged pressure on specific areas. By staying vigilant and proactive, you can ensure that your appliances remain in optimal condition while in storage, ready for future use when you need them.

How to Store Appliances in a Storage Unit In Scottsdale, Arizona

Conclusion

Storing appliances in a self-storage unit is essential for keeping them safe and ready to use in the future. Here are some simple tips to help you store your appliances effectively. First, clean each appliance to remove any dust or dirt. Defrost your refrigerator and microwave and wipe them down with a mild detergent. Keep all electrical cords, hoses, and manuals with their respective appliances.

Store upright appliances like fridges and dishwashers stacked to save space. Make sure appliances are easily accessible by placing them near the front of the unit. Use a checklist to keep track of what you’ve stored. By following these easy self storage tips, you can ensure that your appliances stay in good condition while in storage.

Reserve your Storage Unit today!

At McDowell Mountain Community Storage, we’re committed to storing your appliances safely and securely. Our climate-controlled self-storage units in Scottsdale, Arizona, provide the ideal environment for preserving the condition of your valuable appliances. Whether you’re storing refrigerators, ovens, or washing machines, our facilities are equipped to maintain optimal temperature and humidity levels, protecting your appliances from damage caused by extreme weather conditions.

With our expertise and state-of-the-art storage solutions, you can rest assured that your appliances will remain in top-notch condition until you’re ready to use them again. Contact us today to rent a storage unit and learn more about how we can assist you in storing your appliances effectively.

FAQs: How to Store Appliances in a Storage Unit

1. What are the benefits of using climate-controlled storage for my appliances?

Climate-controlled storage helps maintain optimal temperature and humidity levels, protecting appliances from damage caused by extreme weather, moisture buildup, and potential rust or mold growth.

2. How long can I store my appliances in a storage unit?

   Appliances can typically be stored for as long as needed, but it’s advisable to check them periodically for moisture buildup or other issues, especially if stored for extended periods.

3. Is it necessary to unplug appliances before storing them?

   Yes, unplugging appliances is essential to prevent electrical issues and ensure they are safe for storage. Make sure to keep cords neatly organized and labeled with their respective appliances.

4. Should I use specific cleaning products on my appliances before storage?

   Use gentle cleaners that won’t damage surfaces. Avoid harsh chemicals that could leave residues or cause corrosion. For refrigerators, ensure all cleaning agents are thoroughly rinsed out before storage.

5. Can I store appliances that still have food residues?

   No, it’s essential to thoroughly clean all appliances to remove food residues, which can attract pests and lead to unpleasant odors. Make sure they are scorched before storing them.

6. What precautions should I take for storing sensitive electronic appliances?

   To protect electronic appliances from bumps, wrap them in bubble wrap or furniture blankets. Consider using moisture-absorbing products to prevent humidity-related damage.

7. How can I prevent pests while storing my appliances?

   Regularly inspect your storage unit for signs of pests, and consider using pest deterrents like traps or natural repellents. Keeping your appliances clean and free from food particles also helps prevent infestations.

8. Is it advisable to stack appliances in storage?

   Stacking appliances should be done with caution. Heavier appliances should be placed at the bottom, while lighter ones can be stacked on top, ensuring stability and reducing the risk of damage.

9. What should I do if I notice moisture in my storage unit?

   If you notice moisture, it’s essential to address it immediately. Consider using a dehumidifier, placing moisture-absorbing packets in the unit, and ensuring proper ventilation to prevent damage.

10. Are there any insurance options for stored appliances?

   Yes, many storage facilities offer insurance options for stored items. It’s wise to check with your facility about coverage options to protect your appliances against potential damage or loss while in storage.

How to Store Electronics in a Storage Unit?

Electronics have become an integral part of our daily lives in today’s digital age. From smartphones to laptops, cameras to gaming consoles, we rely on these devices for communication, work, entertainment, and more. But what happens when you need to store these electronics away for a while?

Proper storage is essential to ensure they remain in good condition and ready for use when you retrieve them. Whether you’re moving, decluttering, or need extra space, here’s a smart guide on how to store electronics in a storage unit.

How do you Store Electronics in a Storage Unit?

Here are the things that you need to do to properly store your electronic devise in a storage unit:

1. Prepare Your Electronics

When storing fragile electronic gadgets in a self-storage facility, taking care of a few things can make a big difference. First, remove batteries and store them separately to prevent corrosion. Back up essential data from devices like computers or phones. Clean screens and wipe down surfaces to keep them dust-free. Consider storing gadgets in secure containers or boxes, along with their cords and instructions. Keep everything cool and dry to avoid heat and moisture damage. Silica gel packets can help absorb excess moisture.

If using cardboard boxes, tape them securely to prevent mold. Remember to label each container, so you know what’s inside. By keeping these tips in mind, you can ensure your electronics stay in good shape while in storage.

2. Use Original Packaging

Whenever possible, use the original packaging for your fragile Electronics. Manufacturers design these boxes to provide the best protection during transportation and storage. If you don’t have the original packaging, consider alternatives like anti-static bubble wrap, foam padding, or custom-fitted cases to secure your gadgets. These options protect against bumps, scratches, and moisture, ensuring your devices stay in good shape. It’s crucial to secure cords and follow any provided instructions. If you plan to store things for a while, be mindful of moisture and heat, and use silica gel packets to prevent mold.

Consider using plastic containers or boxes, and tape up any seams to keep everything secure. For screens, place a plastic sheet or cardboard to shield them. When storing items at a self-storage facility, check for security options and keep backup devices in mind. Whether it’s phones, players, or any other item, take care of them as you pack. Lastly, remember to label containers and keep everything organized for easy retrieval.

3. Climate-Controlled Storage Unit

Electronics, like computers, cameras, cell phones, and audio equipment, are sensitive and easily damaged by extreme temperatures and humidity. To protect these devices, choosing a storage unit with climate control is crucial. These specialized units maintain a stable environment, controlling temperature and humidity levels, which is ideal for safely storing electronics.

This helps prevent moisture buildup, condensation, and temperature fluctuations that harm your valuable devices. Opting for a climate-controlled storage unit is a smart way to ensure your electronics’ longevity and proper functioning, providing peace of mind as they are stored in optimal conditions.

4. Organize and Label

Creating an inventory of the electronics you plan to store is a practical first step in organizing your storage space. Labeling boxes with clear descriptions of their contents ensures easy access and retrieval when needed. It’s wise to pair cables, chargers, and accessories with their corresponding devices to avoid confusion and save time when setting up later. Utilizing cable ties or organizers further prevents tangling and keeps everything neat and orderly within the storage unit.

This systematic approach streamlines the process of finding specific items and minimizes the self-storage risk of losing or misplacing essential accessories, ensuring that your electronics remain complete and ready for use whenever you retrieve them from storage.

5. Elevate from the Floor

Elevating your electronics by placing them on pallets or shelves is a crucial precaution when storing them in a storage unit. This simple step helps safeguard your devices against potential risks such as flooding, leaks, or other unforeseen issues that could compromise the integrity of the storage unit. By keeping your electronics off the floor, you minimize the likelihood of water damage and moisture infiltration, ensuring the safety of your valuable items.

Additionally, elevating electronics allows for better air circulation around them, which helps regulate temperature and prevent humidity buildup. This promotes a more conducive environment for storing electronics, preserving their functionality, and prolonging their lifespan while in storage.

6. Protect Against Dust

Over time, dust accumulation threatens electronic components, potentially leading to damage and performance issues. To shield your devices from this hazard, employ preventive measures such as using dust covers or wrapping them in breathable materials like cotton sheets. This additional layer of protection acts as a barrier, safeguarding your electronics against dust particles and ensuring they remain clean and fully operational.

By taking these precautions, you extend the lifespan of your devices and maintain their optimal functionality, allowing you to rely on them whenever needed.

How to Store Electronics in a Storage Unit In Scottsdale

7. Securely Pack Small Items

When storing small electronic items such as headphones, cameras, or handheld devices, it’s important to use appropriately sized boxes to keep them secure. Opt for small boxes that snugly fit the items to minimize movement during transportation and storage. Fill empty spaces within the boxes with bubble wrap or packing peanuts to cushion and prevent shifting.

This extra layer of protection reduces the risk of damage to the delicate electronic components, ensuring that your items remain intact and functional when you retrieve them from storage. Taking these precautions helps maintain the condition of your small electronic devices and prolongs their lifespan.

8. Avoid Long-Term Storage of Batteries

Before storing electronic devices for an extended period, it is crucial to remove the batteries. This precautionary measure is essential because, over time, batteries can develop leaks, leading to irreversible damage to your electronics. To ensure the longevity of both your devices and batteries, it is recommended that they be stored separately in a cool and dry place.

By taking these simple yet crucial steps, you minimize the risk of corrosive leaks and preserve the overall functionality and condition of your electronic gadgets during storage.

9. Regular Check-Ups

Regular visits to your storage unit to inspect your electronics are highly advisable. During these visits, ensure that the climate control system operates effectively, maintaining stable temperature and humidity levels crucial for electronic devices. Additionally, carefully examine the storage area for any indications of pests or water damage, which could potentially harm your valuable belongings.

By conducting these routine check-ups, you can promptly identify and address any emerging issues before they escalate into significant problems, thus safeguarding the integrity and functionality of your stored electronics. This proactive approach ensures that your electronic devices remain in optimal condition and ready for use whenever you need them, providing you with peace of mind regarding their safety and longevity in storage.

Conclusion

Properly storing electronics in a storage unit demands thoughtful planning and attention to detail. Adhering to the provided tips ensures that your electronic devices will be well-maintained and ready for use upon retrieval from storage. Investing time in preparing and safeguarding your electronics is a prudent measure that yields long-term benefits. This commitment not only preserves the functionality of your devices but also contributes to extending their overall lifespan. Whether protecting against temperature fluctuations, securing delicate components, or organizing accessories, each precautionary step assures your electronics will endure storage conditions effectively, standing the test of time for sustained usability and performance.

Reserve your Self Storage Unit today!

At McDowell Mountain Community Storage, we prioritize safely storing your electronic devices. Our climate-controlled storage units are specifically designed to provide a secure environment for sensitive electronics, ensuring they remain in optimal condition throughout their time in storage. Whether you’re storing computers, TVs, or other electronic gadgets, you can trust that our Scottsdale, AZ facilities offer the ideal solution to meet your needs.

Don’t hesitate to contact us today to reserve your storage unit and gain peace of mind knowing that your electronics are safe!

FAQs: How to Store Electronics in a Storage Unit?

1. What types of electronics can I store in a storage unit?

Most electronic devices, including computers, smartphones, tablets, cameras, and gaming consoles, can be safely stored in a storage unit, especially if properly prepared.

2. Do I need to clean my electronics before storing them?

It would help if you cleaned your electronics to remove dust and debris, which can accumulate and potentially damage components over time.

3. How should I handle fragile electronics during storage?

Use original packaging or protective materials, such as bubble wrap or foam, to cushion fragile items and prevent damage from impacts during transport or storage.

4. Is it safe to store electronics in a non-climate-controlled unit?

It’s advisable Non-climate-controlled units may expose your electronics to extreme temperatures and humidity, damaging sensitive components.

5. What precautions should I take for long-term storage of electronics?

Remove batteries, store devices in excellent, dry locations, and consider using silica gel packets to absorb moisture.

6. How often should I check on my stored electronics?

Regular check-ups every few months are recommended to ensure the environment remains suitable and identify potential issues early.

7. What should I do if I notice water damage in my storage unit?

Immediately remove your electronics, assess the damage, and report the issue to the storage facility to prevent further harm and investigate the cause.

8. Can I store my electronics with their cords and accessories?

Yes, but organize and label them to avoid confusion later. Pair cords with their corresponding devices to streamline retrieval.

9. Is it better to store electronics vertically or horizontally?

Most devices are stored upright (like a tower) to minimize pressure on screens and delicate components.

10. What should I do if I no longer have the original packaging for my electronics?

Use high-quality packing materials, such as antistatic bubble wrap or foam padding, to provide adequate protection and ensure everything is securely packed to minimize movement.

How Self-Storage Can Help When Downsizing Your Home?

Many families need to downsize their living spaces in today’s fast-paced world. Whether due to financial reasons, a desire for a simpler lifestyle, or changes in family dynamics, downsizing can be challenging and rewarding. A helpful blog or guide can provide advice on managing this transition.

Downsizing often involves practical and emotional decisions. Whether moving to a smaller home, transitioning to retirement, or simplifying your life, sorting through years of possessions and deciding what to keep or discard can be overwhelming. Self-storage offers the ideal solution to help manage this change efficiently. It protects your belongings, allowing you to sort, arrange, and optimize your space. With self-storage, you can simplify the downsizing process, make the necessary changes to your living space, and ensure a smooth transition for you and your family.

Reduces the Stress of Sorting Through Belongings

One of the most significant obstacles to overcome during the reduction process is determining which items to retain. Even if you no longer have the space for them, it can be challenging to part with sentimental items, such as family heirlooms, photographs, or memorabilia. Self-storage offers a transitory solution, enabling you to store these cherished possessions while determining whether to keep, donate, or pass them on.

Facilitates the Process of Gradual Downsizing

Downsizing does not necessitate immediate implementation. Begin by relocating items from your house or room to a self-storage unit and progressively clearing them out over time. This journey allows you to evaluate your possessions at your own pace without the pressure of making hasty decisions. If you’re unsure about certain items, having someone assist you or provide additional information can help guide you through the process.

Ensures that Items are Accessible and Organized

People are expected to feel overwhelmed when transitioning to a smaller residence due to the overwhelming volume of items that require organization. Self-storage facilities provide a secure and clean environment to maintain the orderly arrangement of your possessions. Most storage facilities permit you to access your unit at your convenience, enabling you to effortlessly retrieve items that may be required in the future or for special occasions without causing any congestion in your new home.

Offers a Place for Seasonal Items

If your new residence has inadequate storage, it may be impossible to accommodate seasonal items such as winter apparel, camping equipment, or holiday decorations. Self-storage can help by offering a location to store transitory items that are optional on a year-round basis but are not willing to part with. This guarantees that only the most essential items are stored in your new residence.

Facilitates the Process of Relocation

Moving into a reduced space is frequently a component of the downsizing process, which can be challenging when determining the appropriate location for all of one’s possessions. Self-storage can facilitate this process by offering a temporary location to store items incompatible with your new space. For example, you might store seasonal clothing, old photos, or furniture that doesn’t fit immediately. This allows you to focus on the most essential contents, like the items you use daily. With some work and planning, you can gradually sort through many things, deciding what to keep, what to store, and what to part with, without feeling overwhelmed by the process.

Serves as an Aid in Transitional Living

If you are downsizing to a smaller home or apartment that needs to be fully prepared, self-storage can serve as a transient solution. While you await the stabilization of your new living situation, you may store your furniture and possessions in a secure and protected location. This lets you proceed at your tempo without hastening the downsizing process.

How Self-Storage Can Help When Downsizing Your Home In Scottsdale, Arizona

Offers a Secure Environment for Precious Items

Certain items may have substantial sentimental or financial value when downsizing. Self-storage facilities provide a climate-controlled, secure environment to store your most valuable possessions, regardless of their size. With proper inventory management, you can ensure that each item is carefully stored in the appropriate box or container for maximum protection. Following the proper steps during the downsizing process and knowing your items are stored correctly offers peace of mind at all times.

Conclusion

Self-storage offers a practical and adaptable solution to reduce the stress of downsizing, which can be a daunting experience. It helps you adjust and compact your belongings by providing extra storage solutions for everything from family members’ things to hobbies. Whether you need to relocate seasonal items, declutter, or preserve sentimental possessions, self-storage can create more space and organization. With the proper containers, you can safely store items and quickly move through the downsizing process. This approach saves you money by preventing unnecessary purchases of storage furniture. It helps you close the chapter on clutter, ensuring a smoother transition to a smaller home while maximizing your storage options.

Frequently Asked Questions

In what ways does self-storage assist in the storage of furniture during the downsizing process?

It may be necessary to dispose of specific furniture when transitioning to a lower residence. Nevertheless, self-storage enables storing more significant items in a secure and protected location for future use or sale. This can be especially advantageous if you anticipate acquiring a larger residence or wish to preserve furniture until you locate the appropriate location.

When downsizing, is there a minimum rental period for self-storage?

Most self-storage facilities provide flexible rental periods, and there is no requirement for a long-term commitment. Renting a unit for as little as one month is an excellent option for individuals who are downsizing and require temporary storage while transitioning to a smaller residence.

How can I guarantee that my possessions remain in pristine condition during storage?

Use appropriate packing materials, including bubble wrap and sturdy crates, to guarantee that your possessions remain in good condition during storage. Protective sheets or covers are advisable to prevent dust or injury to furniture. Select a climate-controlled device to safeguard delicate items from humidity and temperature fluctuations when storing them.

Is it possible to store large or cumbersome items in self-storage when downsizing?

Indeed, self-storage units are available in various sizes, including larger units designed to accommodate bulky objects such as furniture, appliances, and mattresses. Whether you store a few pieces of furniture or several large objects, you can locate a storage solution suitable for your requirements.

How can self-storage assist me with preventing clutter in my tiny home?

Self-storage can be a savior during the downsizing process, as it enables you to store items that you do not use daily but still need to be prepared to part with. This enables you to maintain the organization and cleanliness of your new, less space while preserving items that hold sentimental or practical value.

Is it permissible for me to share a storage unit with another individual during the downsizing process?

Numerous self-storage facilities permit multiple individuals to share a unit, provided that both parties consent to the rental agreement’s terms. If you are downsizing, sharing a storage unit with a spouse or family member can be a cost-effective solution for storing items unsuitable for your new home.

Are there any supplementary services that self-storage facilities provide to assist with downsizing?

Self-storage facilities offer various services in addition to storage units, including the rental of moving trucks, the provision of packaging supplies (such as tape and boxes), and the provision of moving labor assistance. These services can facilitate the reduction process by enhancing its efficiency and smoothness.

How can I determine whether self-storage is optimal for me when downsizing?

If you discover that your new, smaller home needs to be equipped to accommodate all your possessions, self-storage may be an excellent alternative. It is particularly beneficial if you wish to retain certain items but must still prepare to part with them. If you are still unsure, consult a self-storage facility to determine your options and discuss the space you require and your specific storage requirements.

When downsizing, what qualities should I prioritize in a self-storage facility?

Security features (gated access, surveillance), unit sizes, climate-controlled options, location, and rental flexibility are all factors to consider when selecting a self-storage facility for your downsizing requirements. Additionally, you may investigate facilities that offer 24/7 access or extended hours for convenience.

How can self-storage help sell or donate items during the reduction process?

Self-storage can function as a transient holding location while you organize your possessions. If you intend to sell or donate specific items, storing them in a unit allows you to list them online, organize a yard sale, or coordinate donations without causing a mess in your new home. 

Reserve your Self Storage Units today!

Secure your peace of mind today by reserving your self storage unit at McDowell Mountain Community Storage! Our company offers the perfect solution for safeguarding your belongings during the challenging task of downsizing your home. Whether you’re transitioning to a smaller living space, assisting family members, or simply seeking a temporary storage solution, our state-of-the-art facility in Scottsdale, AZ, provides a range of options to meet your needs.

You can choose the perfect fit for your items with various unit sizes available. Our expert tips and support can help you organize your spaces and make the best decision for your needs. Self-storage offers a variety of benefits, from protecting your possessions to simplifying your move. Rent your storage unit today and take the first step toward a more organized and streamlined lifestyle. Contact us to learn more about “How Self-Storage Can Help When Downsizing Your Home.”